Upload Documents

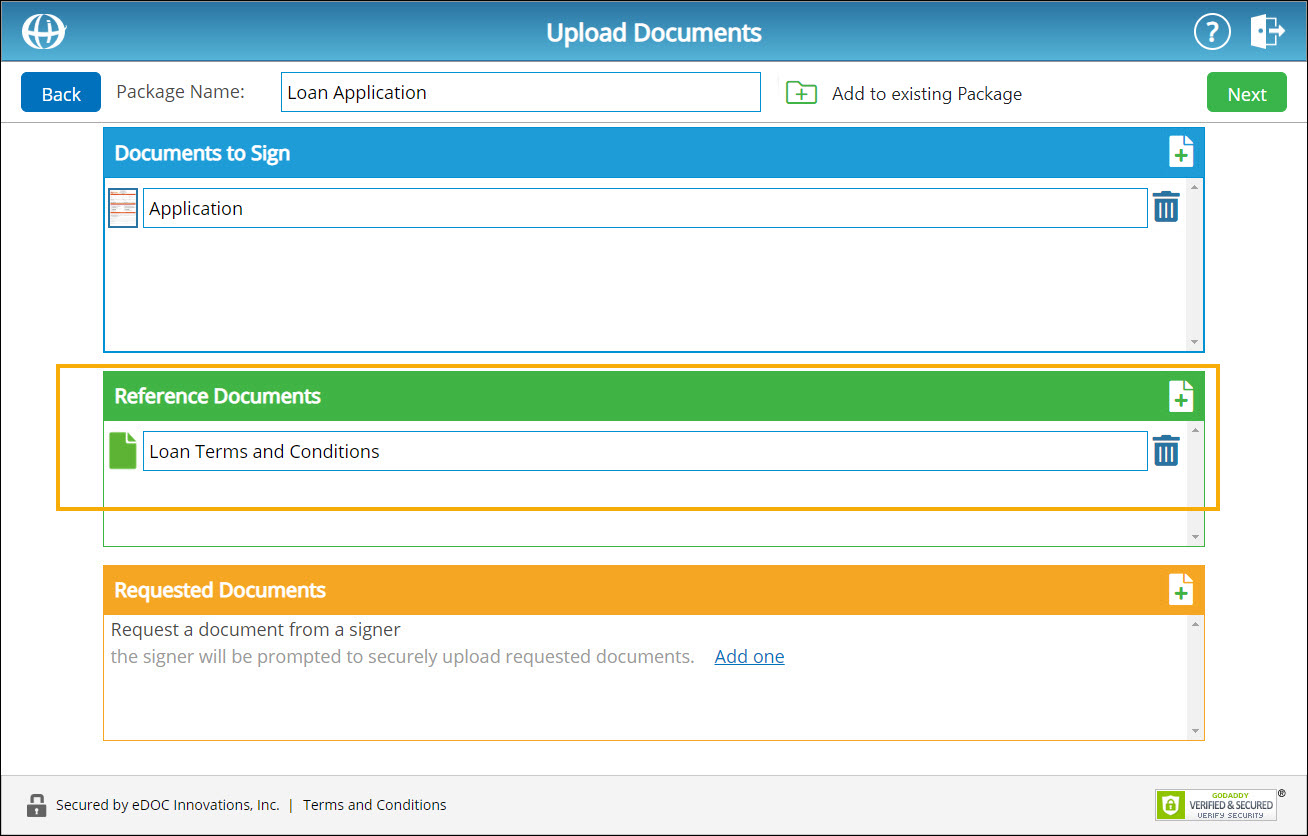
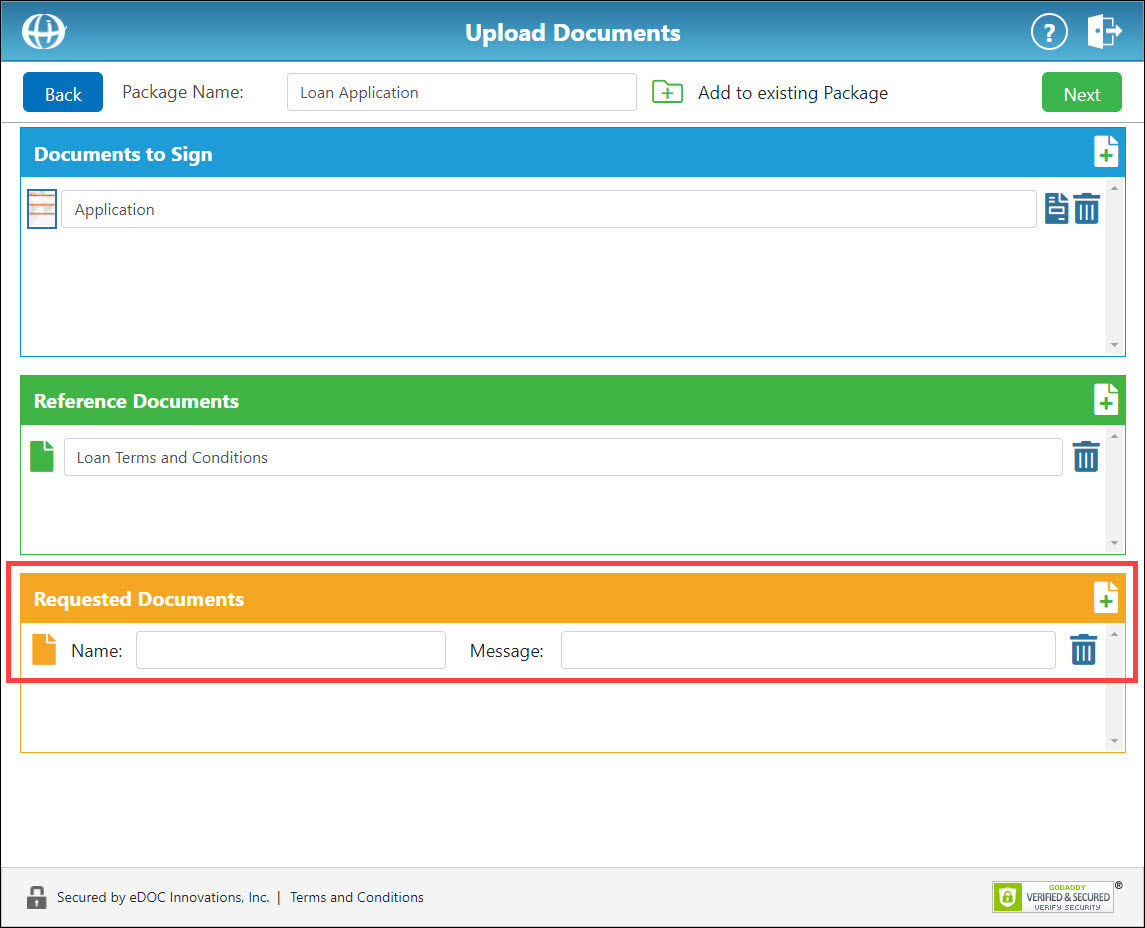
The first step in creating a package is uploading documents for that package. There are three types of documents that can be added to a package from the Upload Documents screen: Documents to Sign, Reference Documents, and Requested Documents.
- Documents to Sign (i.e. "Signing Documents") – Documents that require a signature or another signing element to be completed by the signer.
- Reference Documents – Documents that need to be sent to the signer during a transaction, but don't require a signature or any other further action by the signer. Examples of reference documents include disclosure forms and terms and conditions notices.
- Requested Documents – Documents that a signer needs to send back to the package creator as part of the transaction. For requested documents, no document is actually uploaded by the package creator. An example of a commonly requested document is a copy of a member's Photo ID.
In addition to uploading documents of any type on the Upload Documents screen, you can also include document templates as part of your package. Document templates allow you to easily reuse previously created documents in a new package. Document template types correspond with document types (signing templates, reference templates, and requested templates).
For signing documents, you can apply an existing signing template to a newly uploaded document using the Upload and Apply Template feature. This feature overlays signing elements from a previously created signing template onto a newly uploaded signing document. You can also add Events to signing documents. If a document has not been signed after an allotted number of days, you can use an event to automatically resend the email notification to the signer, send an email notification to the package creator, or delete the document.
Upload Documents to Create a PackageUpload Documents to Create a Package
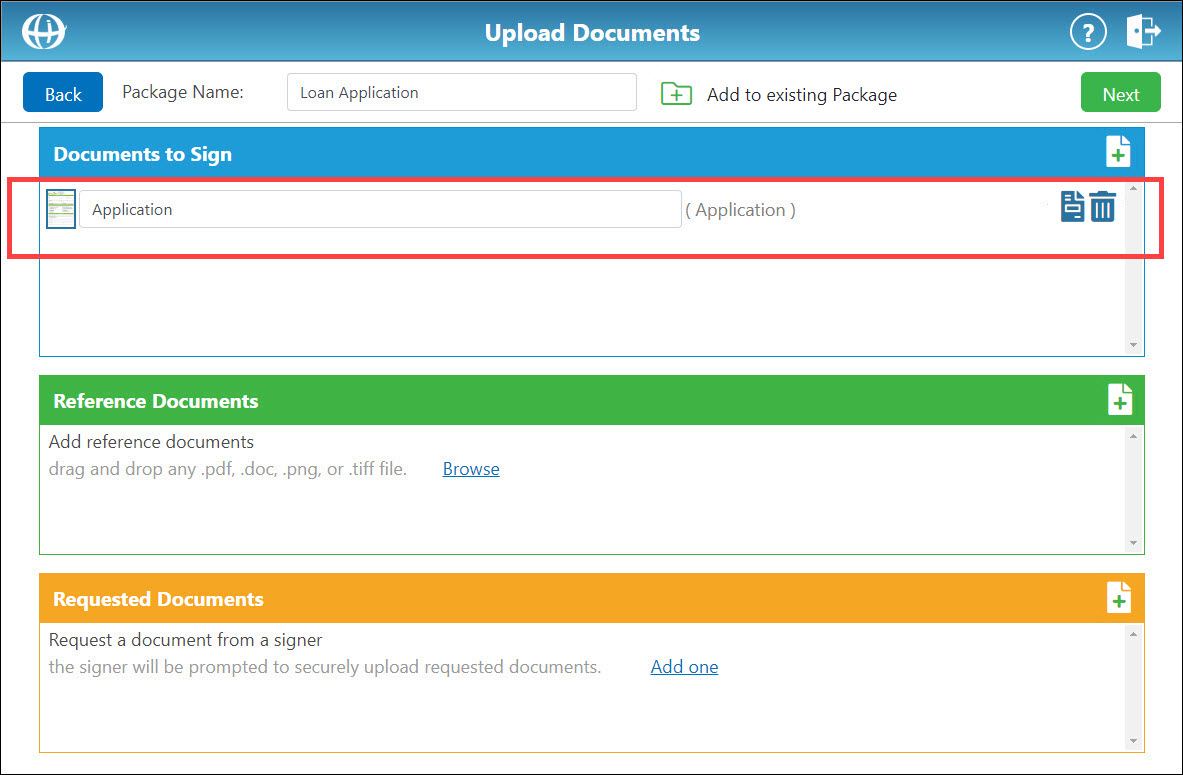
- From the home screen, click Send Document. The Upload Documents screen appears.
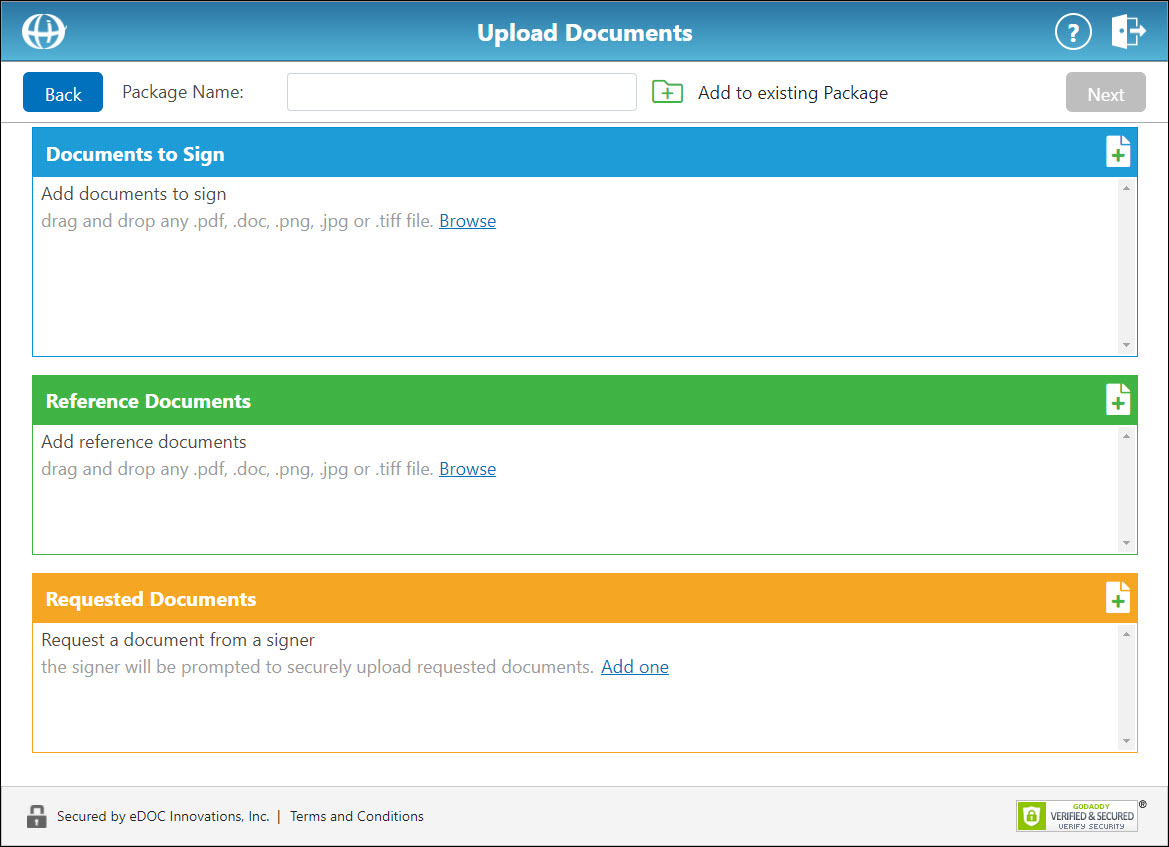
- In the Package Name field, enter a name for the package.
Note: If no package name is entered, the package name defaults to the name of the first uploaded document followed by the date.
- To include the documents you will be adding in an already existing package, click the Add to Existing Package icon
 . A new window appears requesting that you select an existing package.
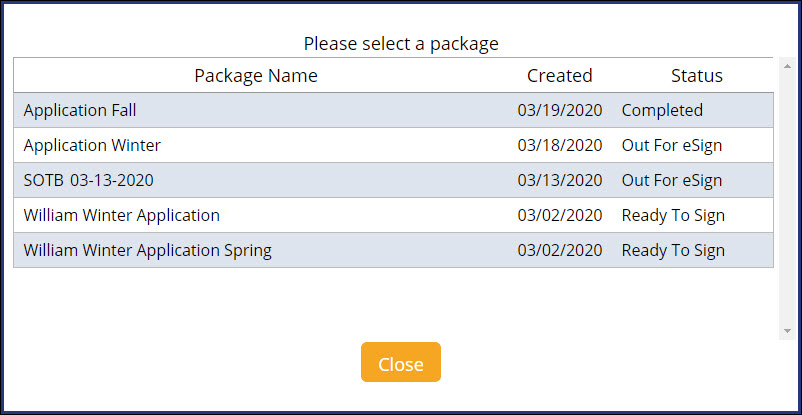
Click on a package name. The package name is automatically placed in the Package Name field, and all proceeding documents will be added to the selected package. - Three types of documents or templates can be added on the Upload Documents screen: Signing, Reference, and Requested.
Add Signing Document(s) or Templates(s)Add Signing Document(s) or Templates(s)
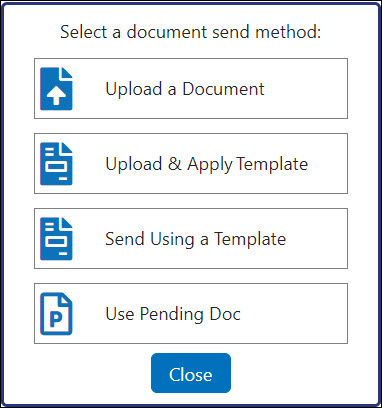
- In the Documents to Sign box, click Browse. Alternatively, click the green plus sign icon
 . A new window appears with four options: Upload a Document, Upload & Apply Template, Send Using Template, and Use Pending Doc.
Upload a DocumentUpload a Document
- Click Upload a Document. A file explorer appears.
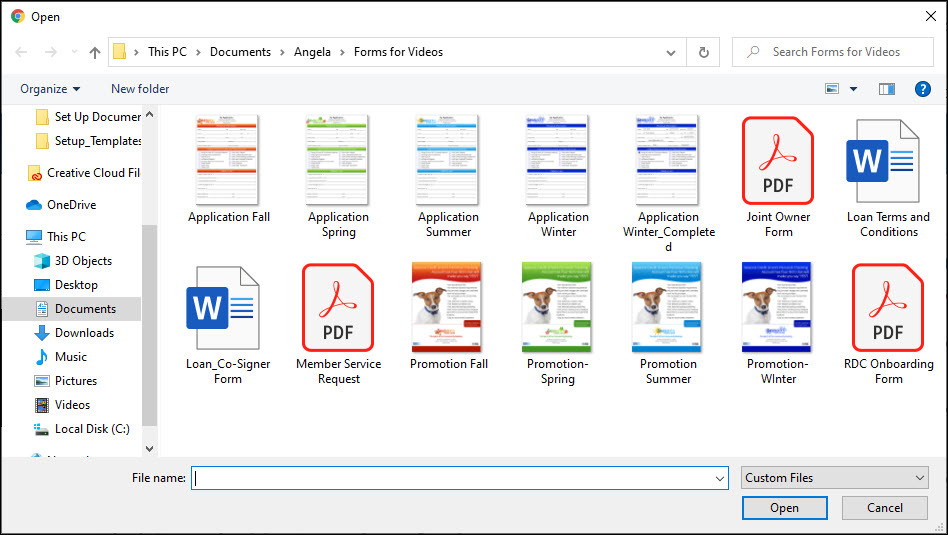
- Use the file explorer to select a signing document. You can upload multiple documents at one time by clicking and dragging your cursor over multiple documents or pressing and holding CTRL while clicking on multiple documents.
Note: The maximum allowable size for an uploaded document is 90 MB.
- Click Open. If the uploaded document closely matches a currently existing template, the following screen appears:
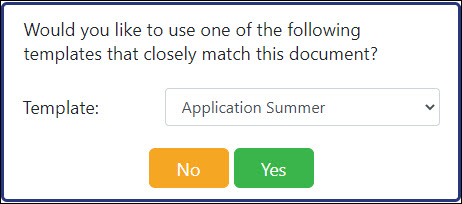
To apply an existing template to the document, from the Template drop-down list, select a template and click Yes.
Otherwise, click No to upload the document without applying a template.
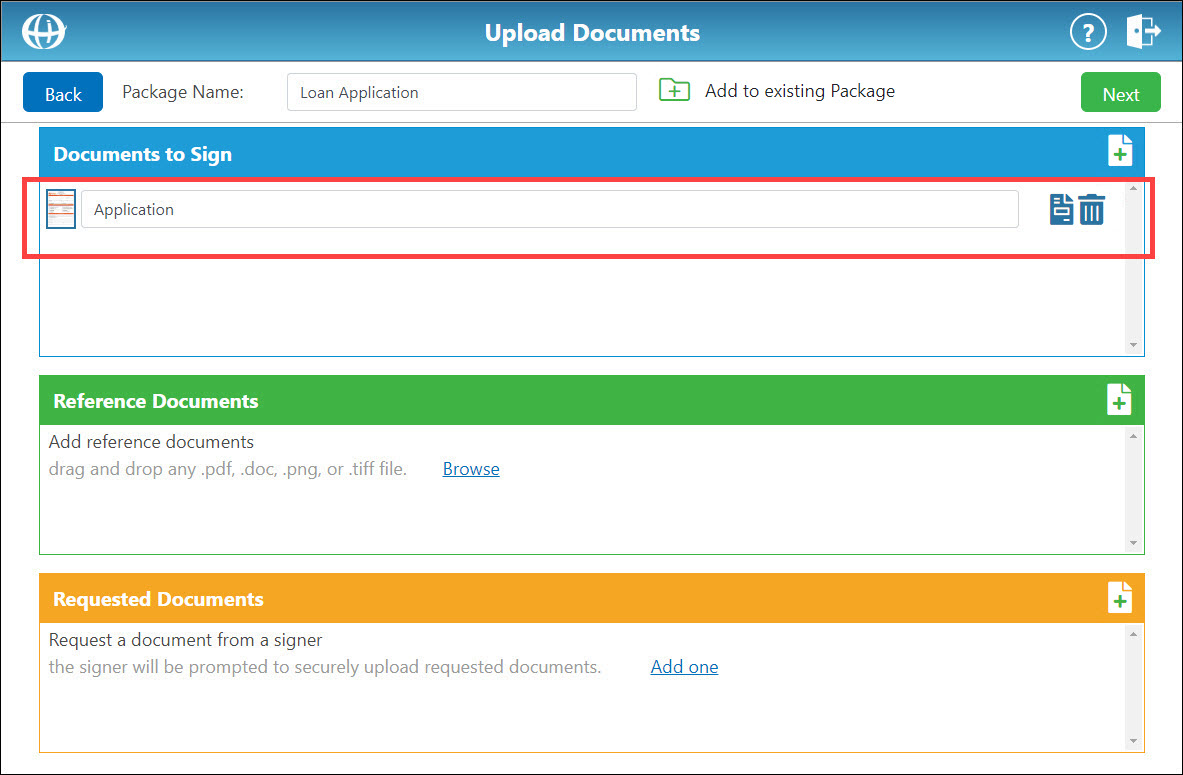
The signing document is added to the package.
Note: If the "Error Creating PDF" message appears while uploading a document, the uploaded file may be password protected or corrupted. To resolve this issue, use one of the following methods:
– Save the file as a new PDF
– Print the file to a PDF printer
– If neither of the above methods resolve the issue, contact eDOC Client Development for further troubleshooting options.
- To apply a template to the uploaded document, click the Apply Template to Document icon
 . A new window appears requesting that you select a template.
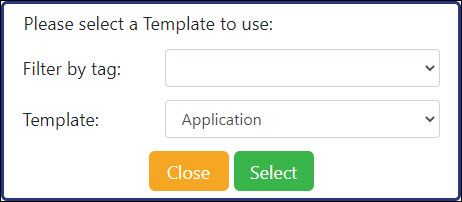
Optionally, from the filter by tag drop-down list, select a tag by which to filter your templates.
From the Template drop-down list, select the template you want to apply to a document.
Click Select. The selected template is applied to the document.
Upload & Apply TemplateUpload & Apply Template
- Click Upload & Apply Template. A new window appears requesting that you select a template to use.
- Optionally, from the filter by tag drop-down list, select a tag by which to filter your templates.
From the Template drop-down list, select the template you want to apply to a document. - Click Select. A file explorer appears.
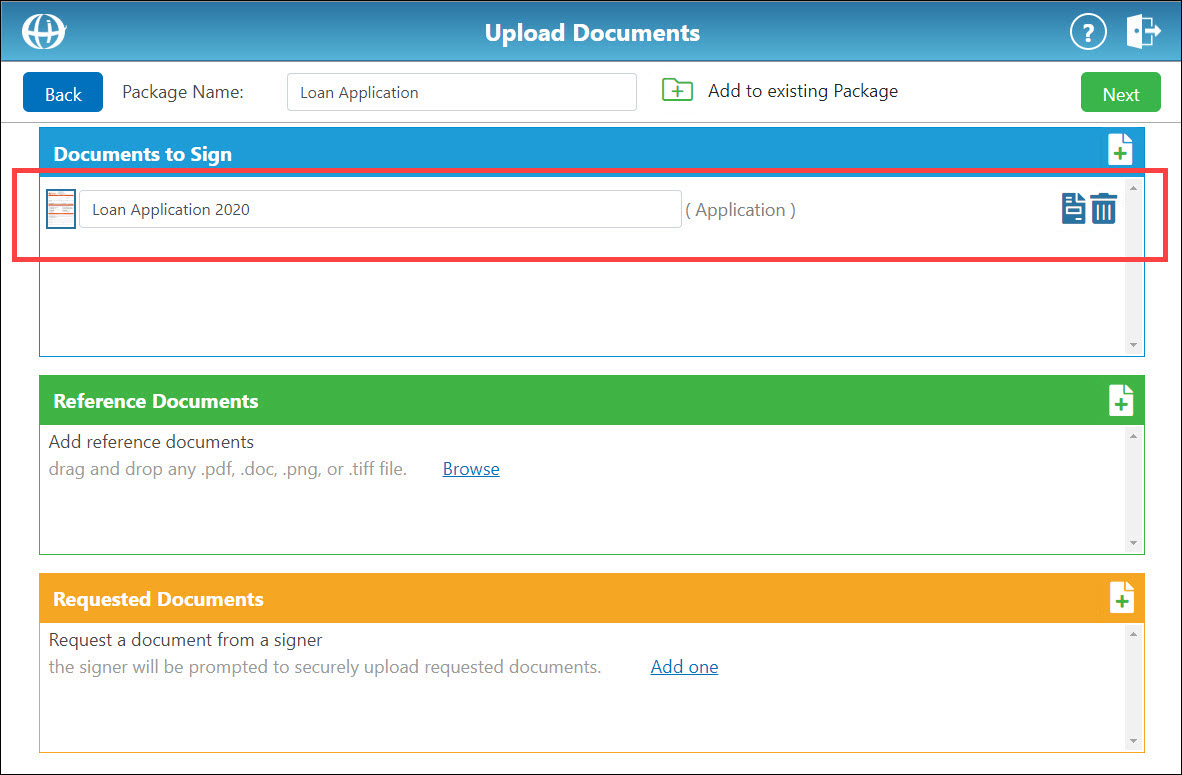
- Use the file explorer to locate the document you want to send for signing and click Open. The document is added to the package with the selected template applied. The name of the applied template appears in parentheses to the right of the document name.
Notes: The maximum allowable size for an uploaded document is 90 MB.
If the "Error Creating PDF" message appears while uploading a document, the uploaded file may be password protected or corrupted. To resolve this issue, use one of the following methods:
– Save the file as a new PDF
– Print the file to a PDF printer
– If neither of the above methods resolve the issue, contact eDOC Client Development for further troubleshooting options.
- To apply another template to the uploaded document, click the Apply Template to Document icon . A new window appears requesting that you select a template.
Optionally, from the filter by tag drop-down list, select a tag by which to filter your templates.
From the Template drop-down list, select the template you want to apply to a document.
Click Select. The selected template is applied to the document.
Send Using TemplateSend Using Template
- Click Send Using a Template. A new window appears requesting that you select a template to use.
- Optionally, from the filter by tag drop-down list, select a tag by which to filter your templates.
From the Template drop-down list, select a template. - Click Select. The signing template is added to the package. The name of the signing template appears in parentheses to the right of the document name.
- To apply a template to the uploaded document, click the Apply Template to Document icon . A new window appears requesting that you select a template.
Optionally, from the filter by tag drop-down list, select a tag by which to filter your templates.
From the Template drop-down list, select the template you want to apply to a document.
Click Select. The selected template is applied to the document.
Use Pending DocUse Pending Doc
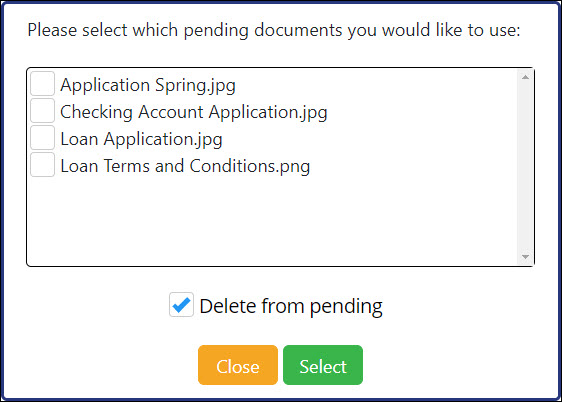
- Click Use Pending Doc. A new window appears requesting that you select one or more pending documents.
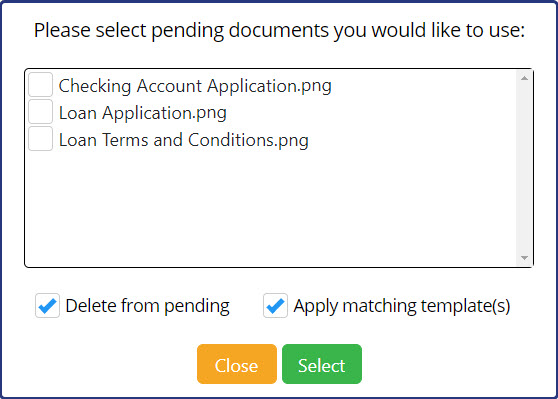
- For each pending document you want to add to the package, check the corresponding box.
To delete these documents from your pending queue after they are uploaded, leave the Delete from pending box checked. Otherwise, uncheck this box.
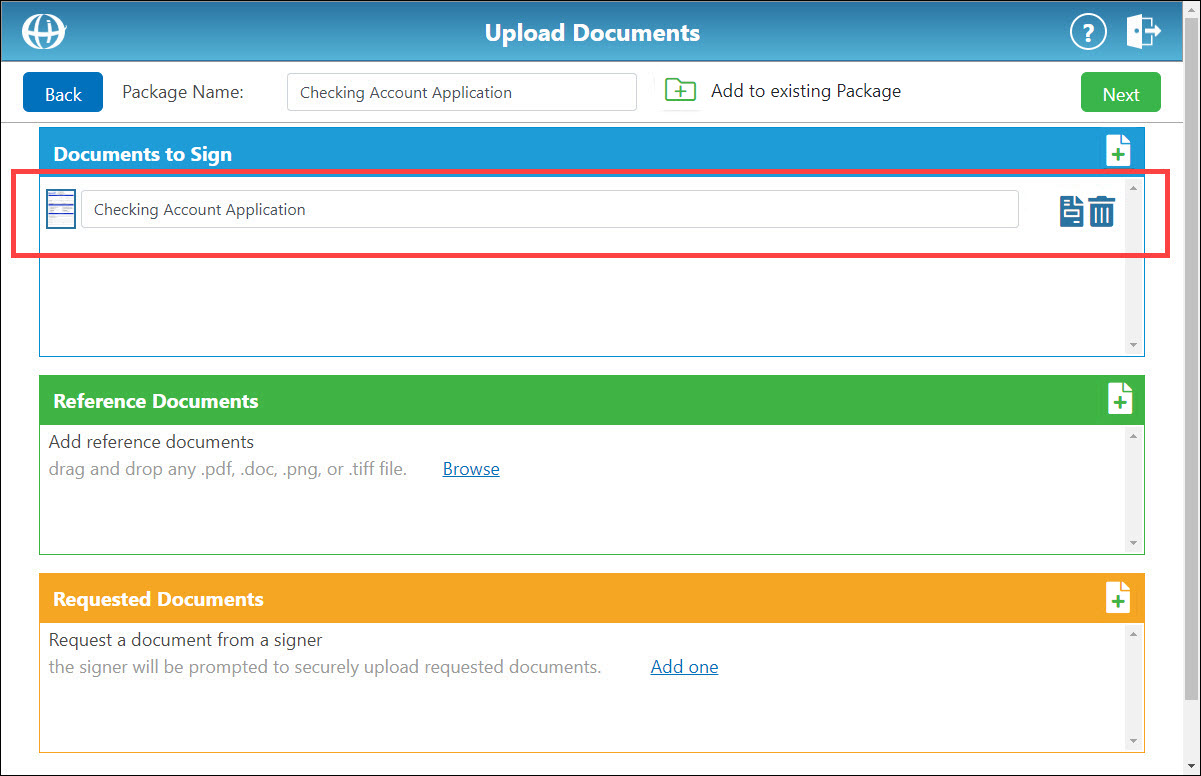
To apply matching templates to document(s) you selected, leave the Apply Matching Templates box checked. Otherwise, uncheck this box. - Click Select. The selected documents are added to the package.
- To apply a template to the uploaded document, click the Apply Template to Document icon . A new window appears requesting that you select a template.
Optionally, from the filter by tag drop-down list, select a tag by which to filter your templates.
From the Template drop-down list, select the template you want to apply to a document.
Click Select. The selected template is applied to the document.
Add Reference Document(s) or Template(s)Add Reference Document(s) or Template(s)
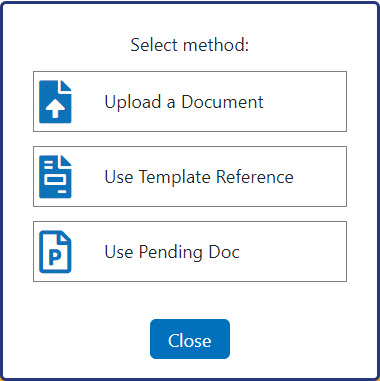
- In the Reference Documents box, click Browse. Alternatively, click the green plus sign icon . A new window appears with three options: Upload a Document, Use Template Reference, and Use Pending Doc.
Upload a DocumentUpload a Document
- Click Upload a Document. A file explorer appears.
- Use the file explorer to select a reference document. You can upload multiple documents at one time by clicking and dragging your cursor over multiple documents or pressing and holding CTRL while clicking on multiple documents.
Note: The maximum allowable size for an uploaded document is 90 MB.
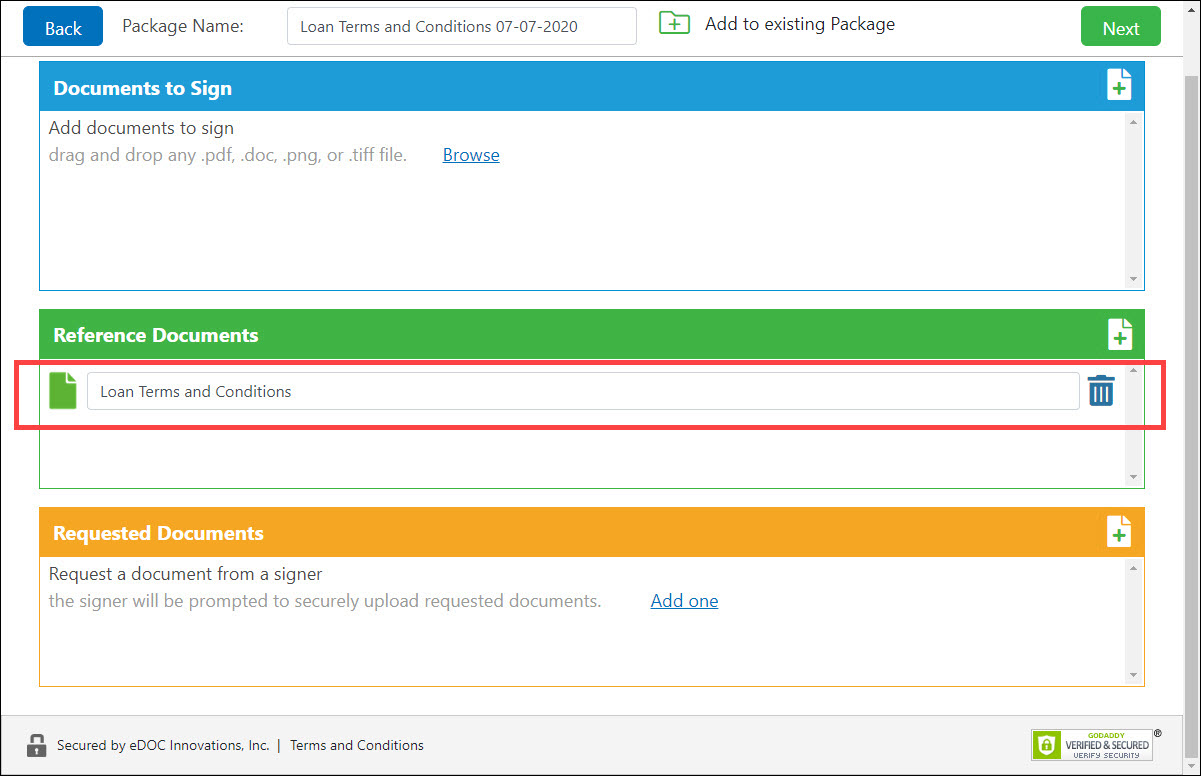
- Click Open. The reference document is added to the package.
Note: If the "Error Creating PDF" message appears while uploading a document, the uploaded file may be password protected or corrupted. To resolve this issue, use one of the following methods:
– Save the file as a new PDF
– Print the file to a PDF printer
– If neither of the above methods resolve the issue, contact eDOC Client Development for further troubleshooting options.
Use Template ReferenceUse Template Reference
- Click Use Template Reference. A new window appears requesting that you select a reference document template.
- From the Template drop-down list, select a template.
- Click Select. The reference template is added to the package.
Use Pending DocUse Pending Doc
- Click Use Pending Doc. A new window appears requesting that you select one or more pending documents.
- For each pending document you want to add to the package, check the corresponding box.
To delete these documents from your pending queue after they are uploaded, leave the Delete from pending box checked. Otherwise, uncheck this box. - Click Select. The selected documents are added to the package.
Add Requested Document(s) or Template(s)Add Requested Document(s) or Template(s)
- In the Requested Documents box, click Add One. Alternatively, click the green plus sign icon . A new window appears with two options: Create New Request and Use Requested Template.
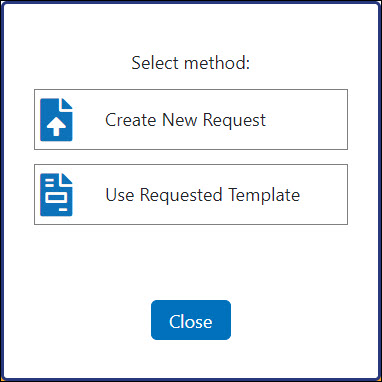
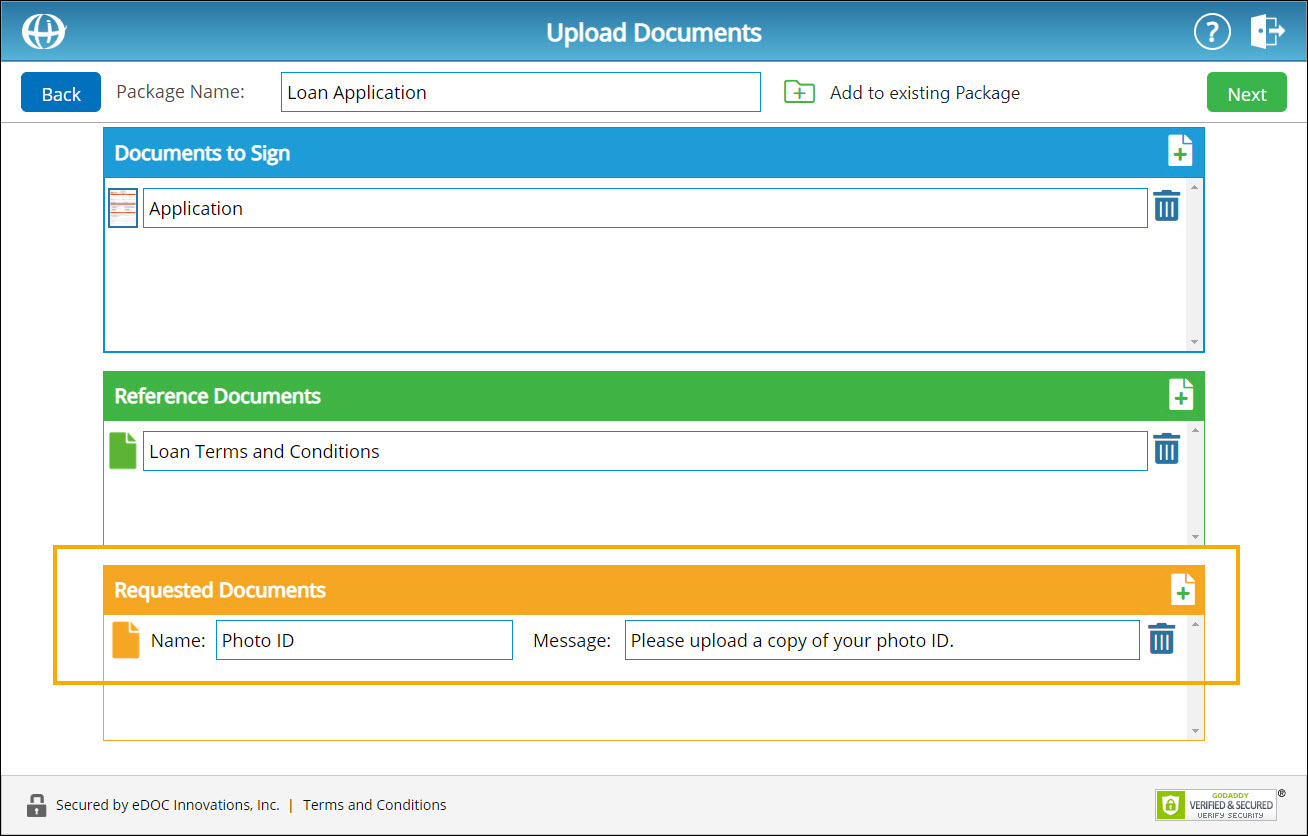
Create New RequestCreate New Request
- Click Create New Request. A set of new fields appears in the Requested Documents box to create a new request.
- In the Document Name field, enter a name for the requested document.
In the Message field, enter a brief message for the person receiving the document request.
Note: The Document Name and Message must each be at least three (3) characters long.
- The requested document is added to the package.
Use Requested TemplateUse Requested Template
- Click Use Requested Template. A new window appears requesting that you select a requested document template.
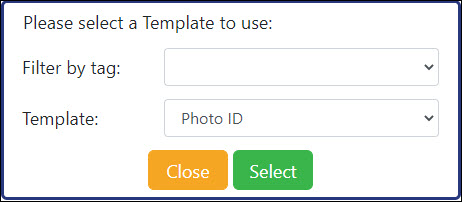
- From the Template drop-down list, select a template.
- Click Select. The requested document template is added to the package.
Instructions After All Desired Documents and Templates Have Been Added
To rename any document added to a package, in the Document Name field, enter a new name for the document.
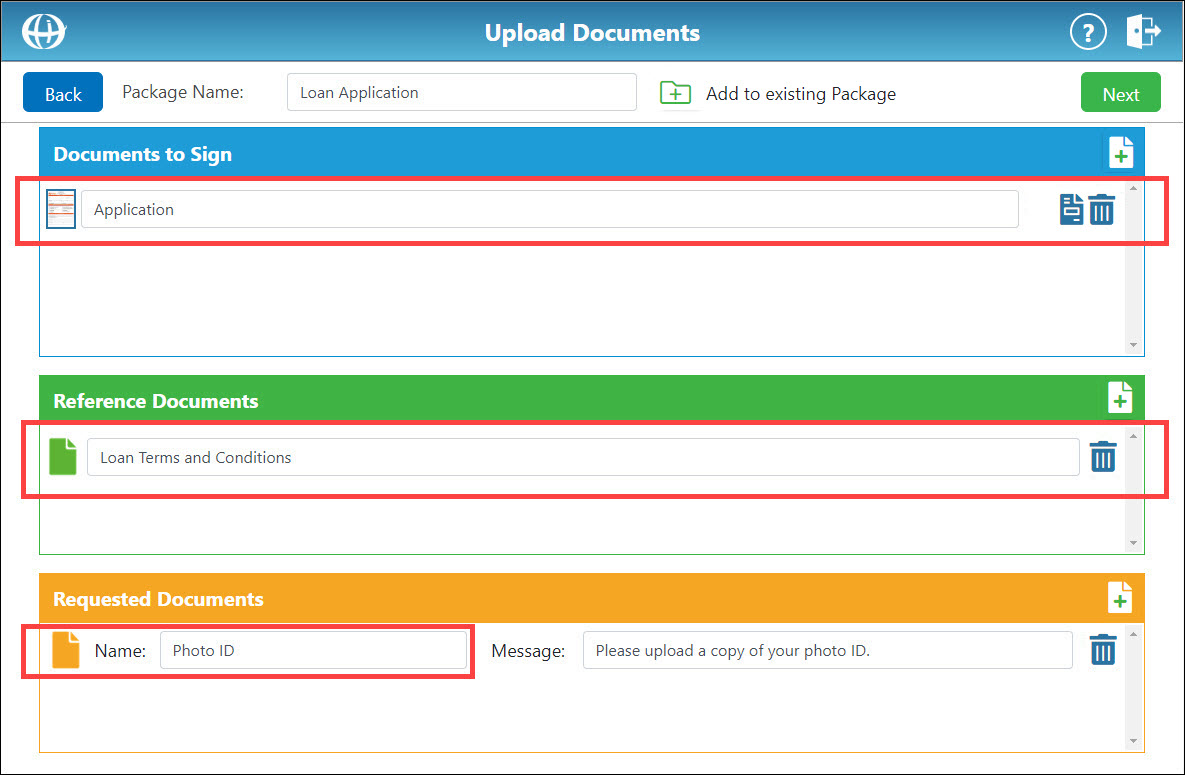
To delete any document added to a package, click the corresponding trash can icon ![]() .
.
When all desired documents have been added to the package, click Next to Select or Assign Signers.