Users Tab
The Users tab allows you to add new users to the eDOCSignature system, add users to a group, and change a user's permissions. You can also modify a user's full name, email address, or password, or delete the user from the system altogether. If a user is locked out of eDOCSignature after too many failed login attempts, you can unlock their account from this tab.
Note: Portions of this tab are accessible by permission only, including the ability to change settings and edit users.
You cannot add new users unless an administrator has granted you the Edit Users permission.
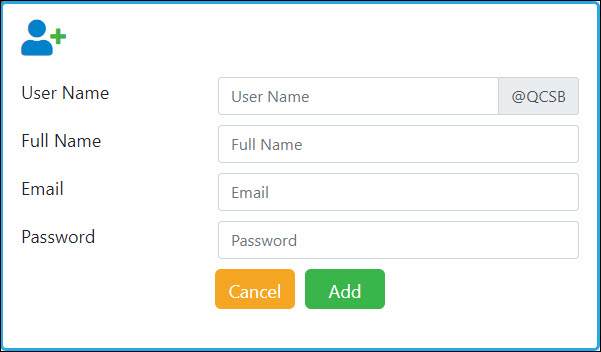
- In the top-right corner of the screen, click Add. A new window appears.

- In the User Name field, enter the new user's user name.
In the Full Name field, enter the new user's full name.
In the Email field, enter the new user's email address.
In the Password field, enter the new user's password. - Click Add. The new user is added to the system.
You cannot delete users from the system unless an administrator has granted you the Edit Users permission.
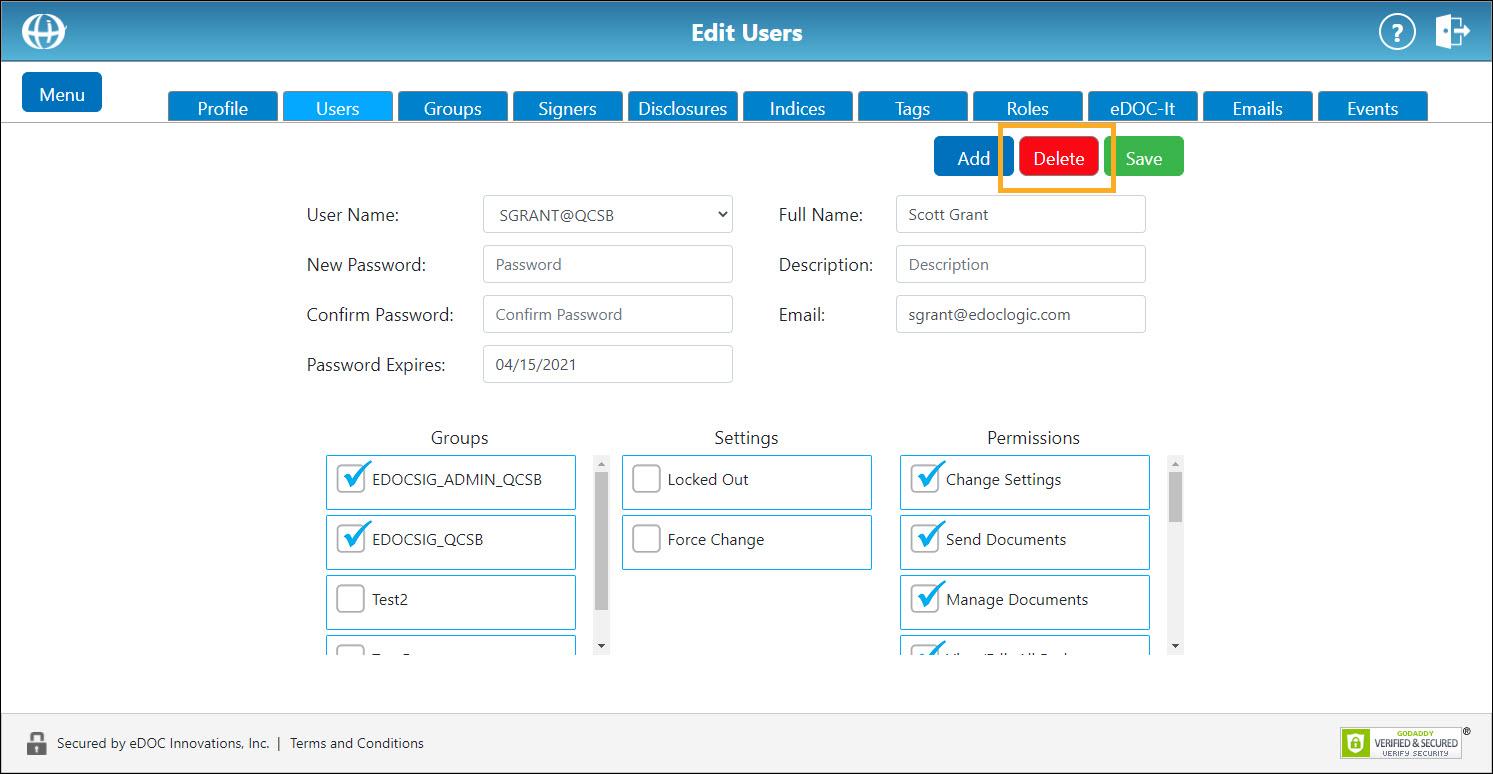
- From the User Name dropdown list, select the user whose account you would like delete. A Delete button appears in the top-right corner of the screen.

- Click Delete. In the confirmation box that appears, click Yes. The user is removed from the system.
Modify a User's Groups, Settings, and PermissionsModify a User's Groups, Settings, and Permissions
Some settings and permissions cannot be changed unless an administrator has granted you the Change Settings permission.
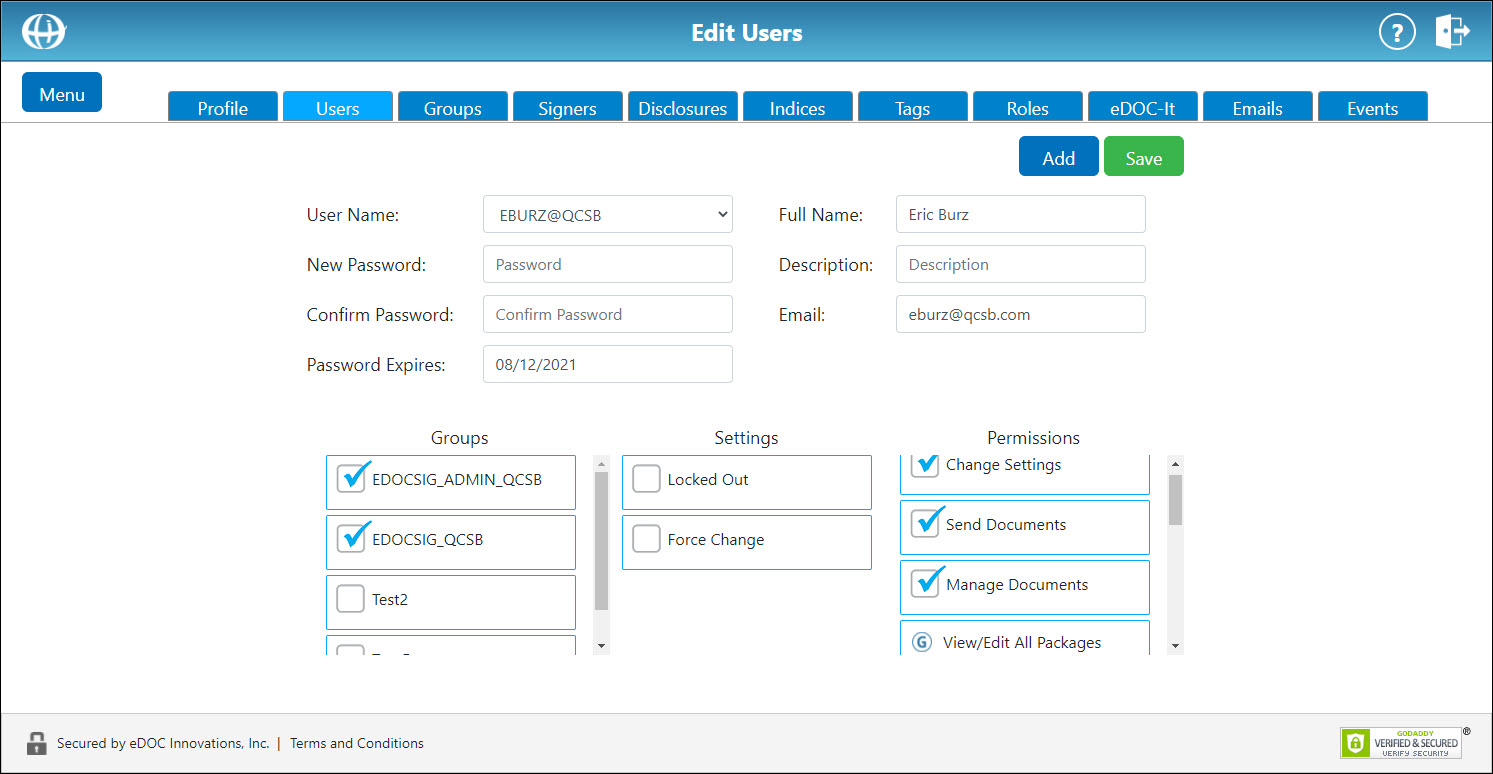
- From the User Name dropdown list, select the desired user. A set of fields and tables for that user's groups, settings, and permissions appear.

- To change the user's full name, in the Full Name field, enter the user's updated name.
- To change the user's password, in the New Password field, enter the user's new password. In the Confirm Password field, enter a matching password.
- To change the user's email address, in the Email field, enter an updated email address.
- To add a description for a user, in the Description field, enter a short description.
- The Password Expires field determines when the user's password will expire. To modify the user's password expiration date, enter a new date in this field.
- To change the groups to which the user belongs, in the Groups table, check or uncheck the corresponding boxes.
Note: This action can also be performed from the Groups tab.
- In the Permissions table, a check mark indicates which permissions are currently granted to the user. A
 icon indicates that the user is granted a permisson based on group membership.
To change the permissions granted to the user, in the Permissions table, check or uncheck the corresponding boxes.
To change the permissions granted to the user based on group membership, see step 7 above.
View Permission DescriptionsView Permission Descriptions-
Change Settings – Allow user to change eDOCSignature Settings. If this permission is disabled, the user will not have access to the Settings or Permissions menus available on the Users tab.
- Send Documents – Allow user to create and send a document for signing.
- Manage Documents – Allow user to edit or delete an existing document.
- View/Edit All Packages – Allow user to manage documents/packages from other users.
- Edit Users – Allow user to manage users.
- Edit User Passwords – Allow user to edit other user's passwords.
- Edit Groups – Allow user to manage groups.
- Edit Disclosure – Allow user to edit the institution user agreement.
- Reset Package – Allow user to reset a package to its original unsigned state.
- Close Package – Allow user to finish package without completing all signatures.
- Delete Package – Allow user to delete a package from the eDOCSignature system.
-
- The Settings checklist contains two settings:
- Locked Out – If this box is checked, the user is currently locked out. To unlock the user, uncheck this box.
- Force Change – To force the user to change their password upon next login (regardless of the date entered in the Password Expires field above), check this box.
- When all desired changes have been made, in the top-right corner of the screen, click Save.