Set Up Bulk Send
The Set Up Bulk Send feature allows you to send a single signing template to multiple signers via email for them to sign. From the Bulk Send Results screen, you can set up a new bulk send job, view the status of bulk send jobs, and view your history of bulk send jobs.
Set Up New Bulk Send JobSet Up New Bulk Send Job
- From the eDOCSignature home screen, click Set Up Bulk Send. The Bulk Send Results screen appears.
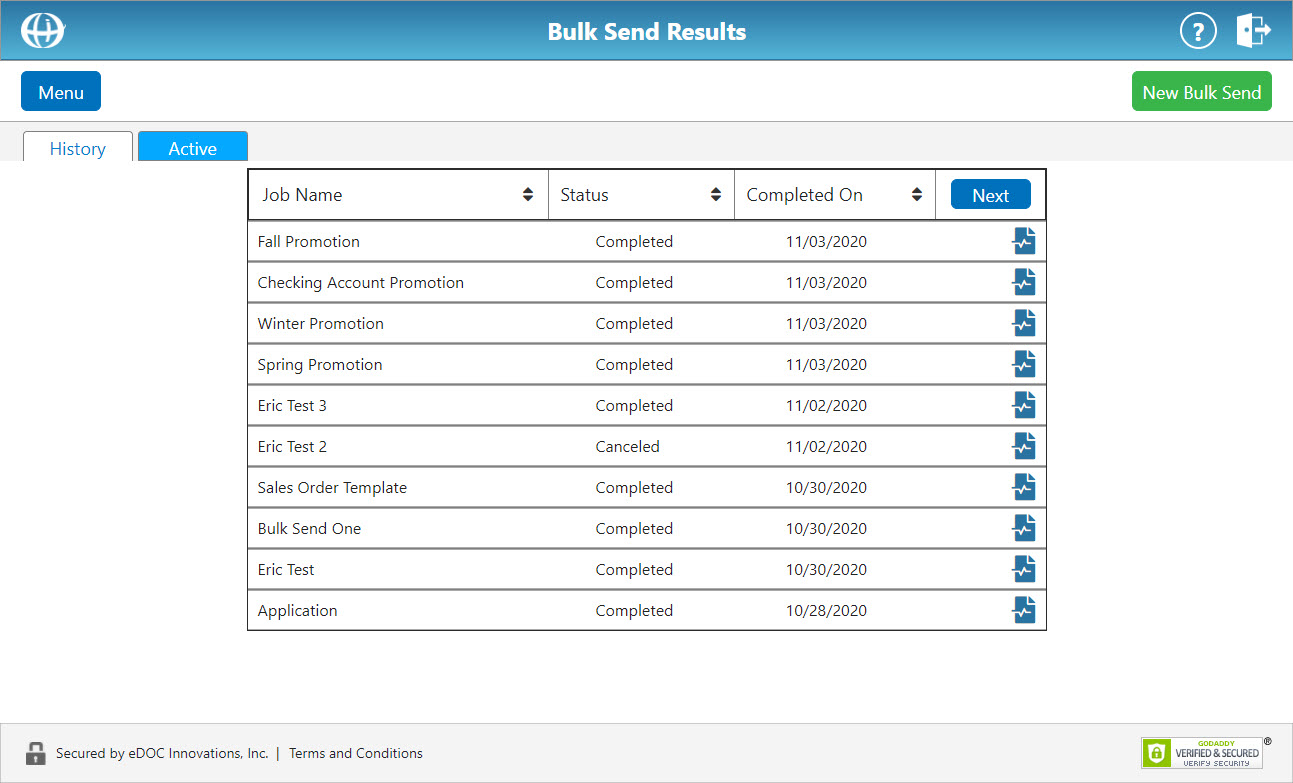
- In the top-right corner of the screen, click New Bulk Send. The Set Up New Bulk Send screen appears.
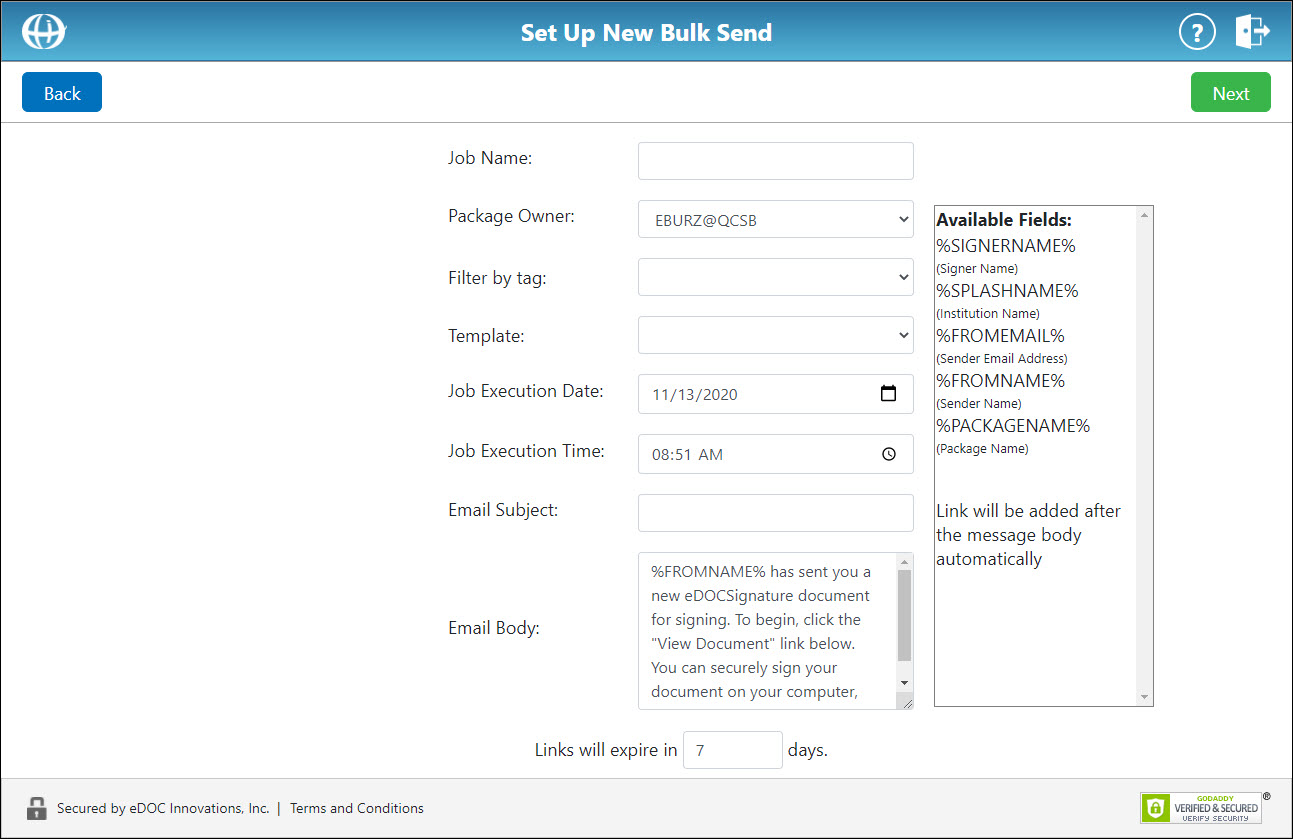
- In the Job Name field, enter a name for the bulk send job.
The notification recipient is the person who will be the “owner,” or “creator,” of each package created from the bulk send. From the Notification Recipient drop-down list, select a notification recipient.
From the Template drop-down list, select a template to send for signing. If desired, you can filter filter templates based on tag using the Filter by tag drop-down list.
In the Job Execution Date and Job Execution Time fields, enter a date and time at which to initiate the bulk send job.
In the Email Subject field, enter the desired subject line for the bulk send email each member will receive.
In the Email Body field, enter the message you want displayed in the body of the bulk send email each member will receive.
In the Links will expire in [Number of Days] days field, enter the number of days for which you would like the signing links in each email to remain active. -
You can modify the email body's content using plain text or HTML. The Available Fields list provides you with pre-configured field tags that are automatically filled in when the email is sent. For example, if the %SIGNERNAME% field is inserted, thesigner's full name is automatically placed in that field.
In the Email Body field, enter the message you want displayed in the body of the bulk send email that each member will receive.
To insert a field tag into the email body from the Available Fields list, position the cursor where you want the field tag inserted.
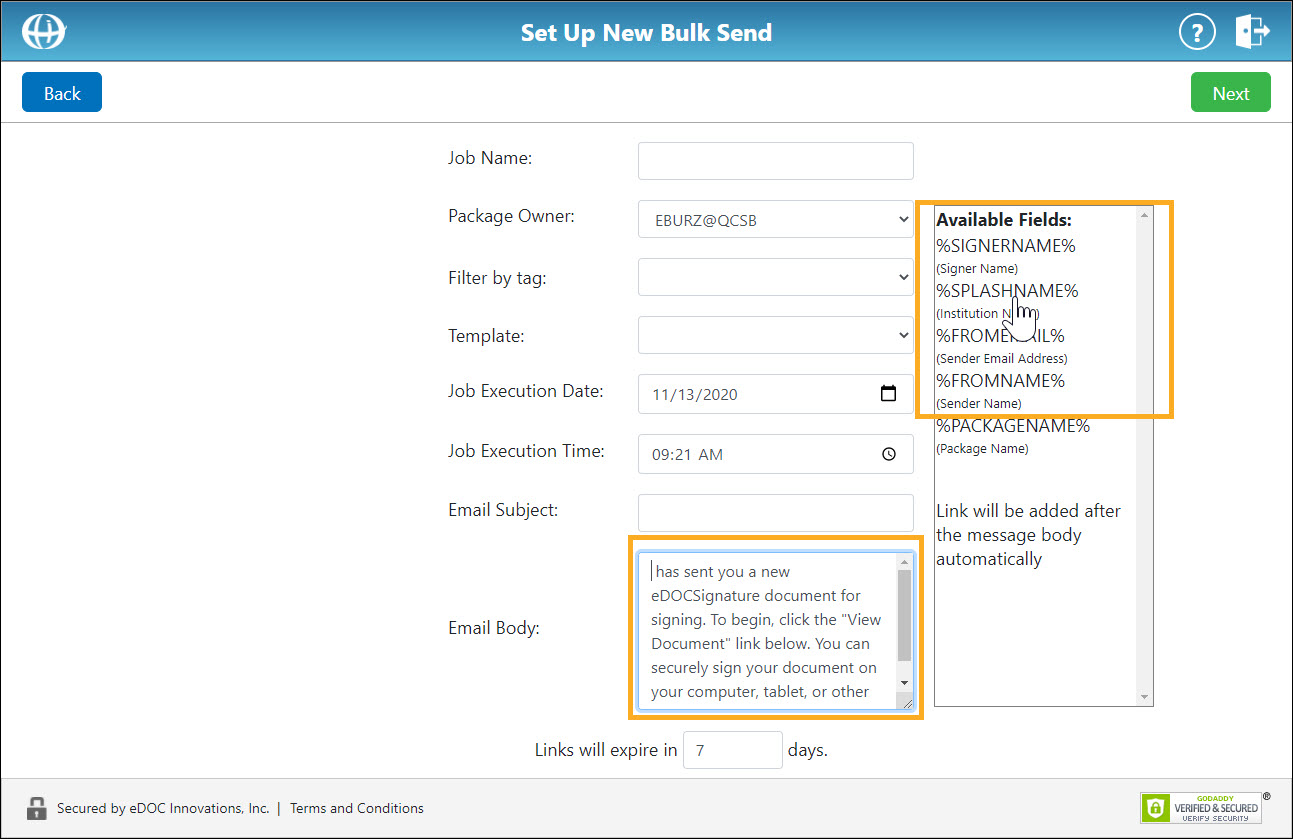
Click on the field tag you want to insert. The field tag is inserted into the email body.
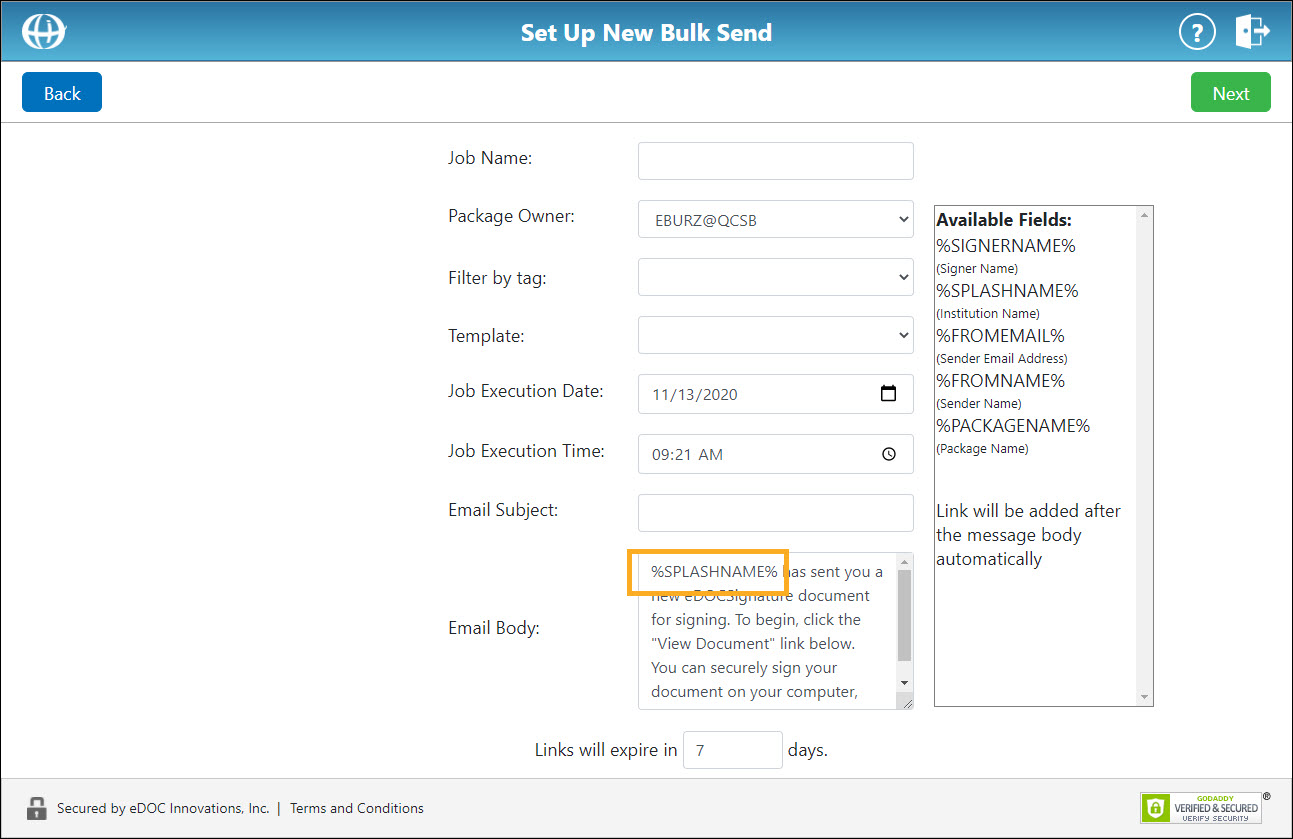
Note: Once inserted into the template, you can copy and paste the field placeholder tag if it needs to be moved.
View List of Available Fields TagsView List of Available Fields Tags
-
%SIGNERNAME% – The full name of the signer on the document.
-
%SPLASHNAME% – The name of the institution, (e.g. "ABC Credit Union").
-
%FROMEMAIL% – The “sender's” email address. This may be the email address of the eDOCSignature owner/user. If a user email is not available, or if the option to use an alternate email is selected, this may be the email address of an institution.
-
%FROMNAME% – The email “sender's” name. This may be the name of the eDOCSignature owner/user. If a user's full name is not available, or if the option to use an alternate name is selected, this may be the name of an institution.
-
%PACKAGENAME% – The name of the package.
- When you are finished, click Next. The Select Signers for Bulk Send screen appears.
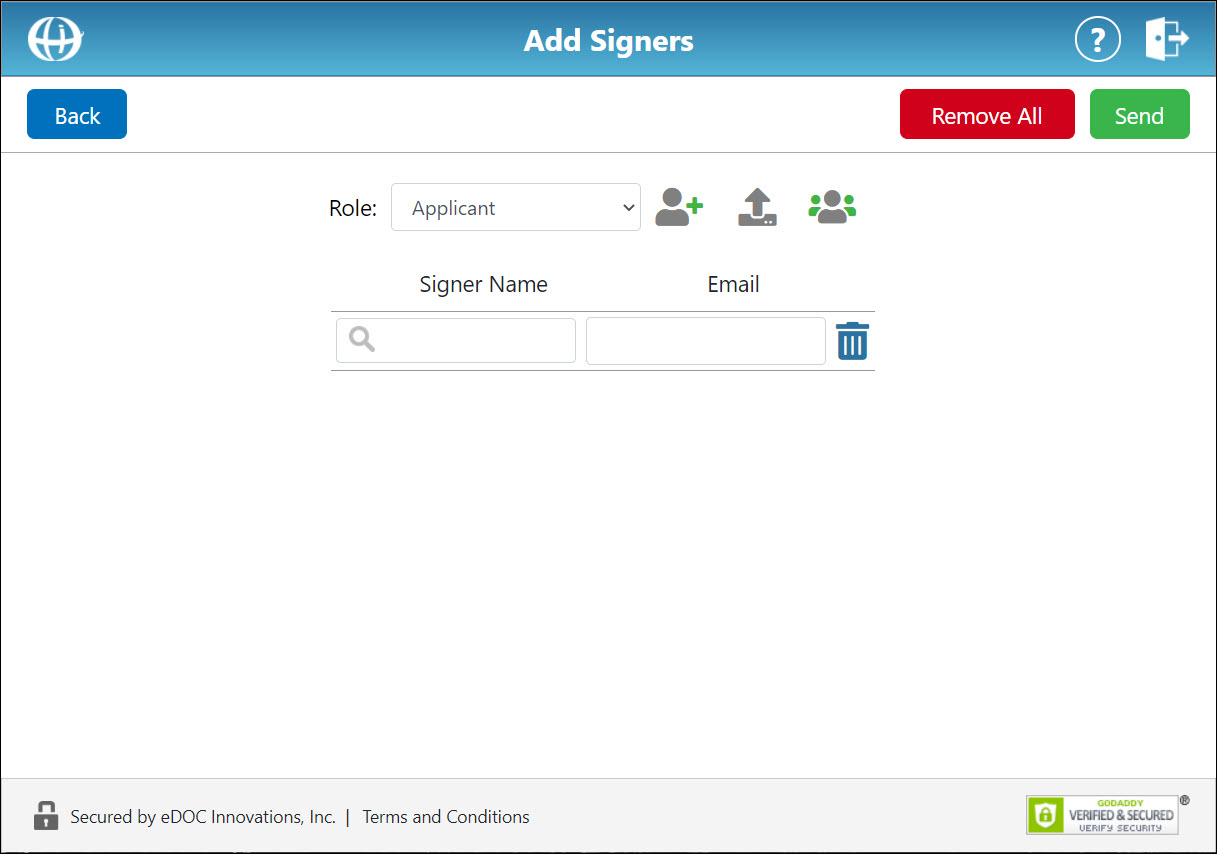
- There are three method of entering signer information on this screen:
- To manually add signer information, in the Signer Name and Email fields, enter a signer name and email addresses. To add additional fields, click the add signer icon
 .
. - To upload a CSV file containing a list of signer names and email addresses, click the Upload CSV icon
 and use the file explorer to select a CSV file.
 - To select a previously created signer group, click the Select From Group icon
 . From the Group drop-down list that appears, select a signer group.
- When you are finished entering signer information, click Send. In the confirmation box that appears, click Confirm. The Bulk Send Results screen reappears with your newly created job showing at the top of the list.
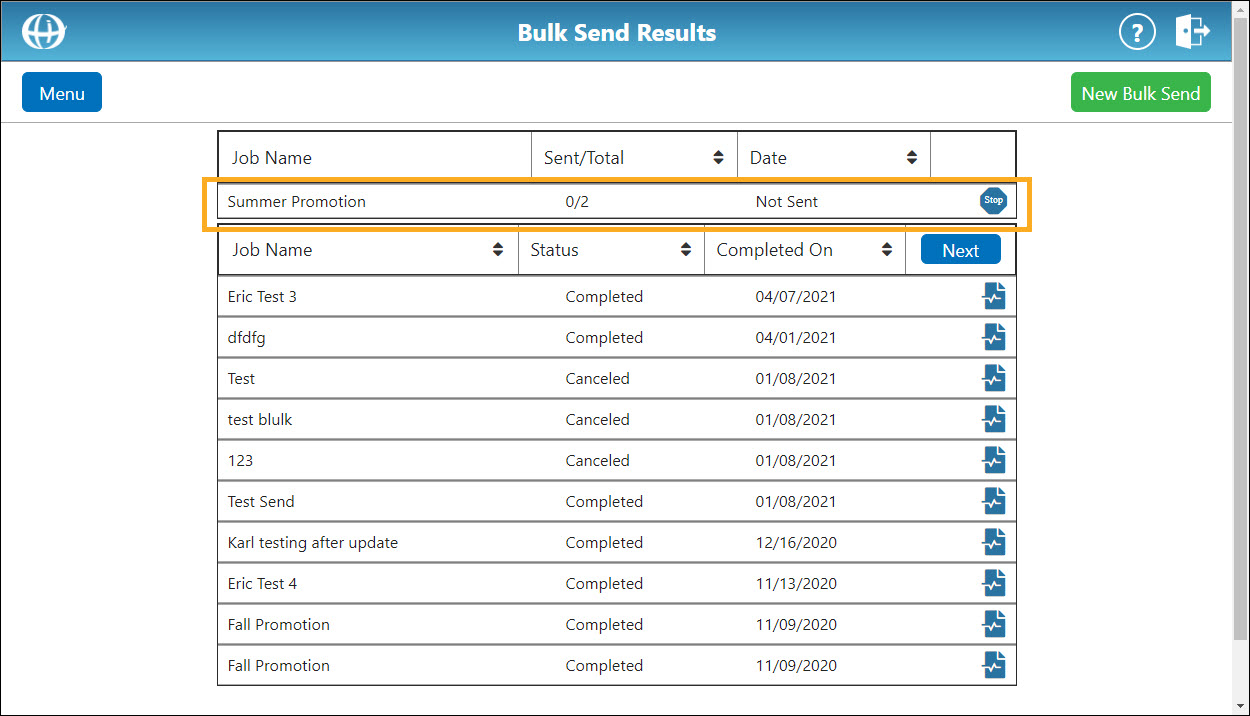
- To cancel the newly created job, click the Stop icon.
View Status and History of Bulk Send JobsView Status and History of Bulk Send Jobs
When a bulk send job has finished, the status of the job changs from "Not Sent" to "Completed."
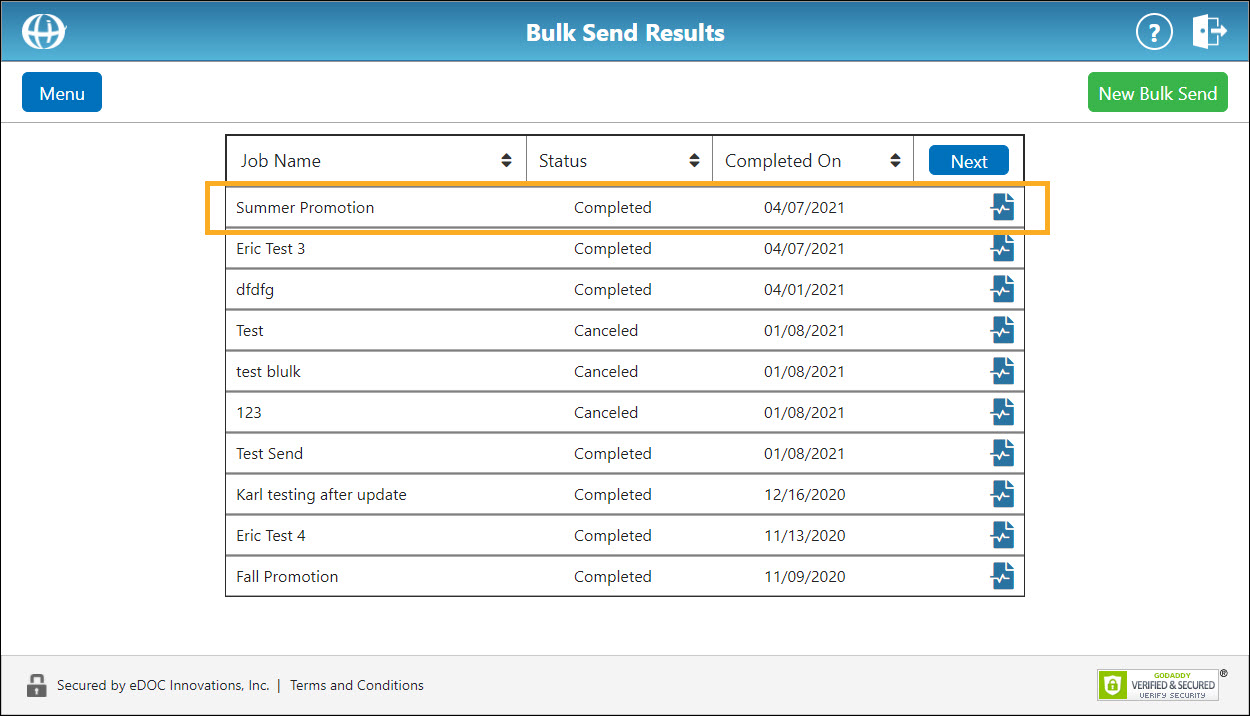
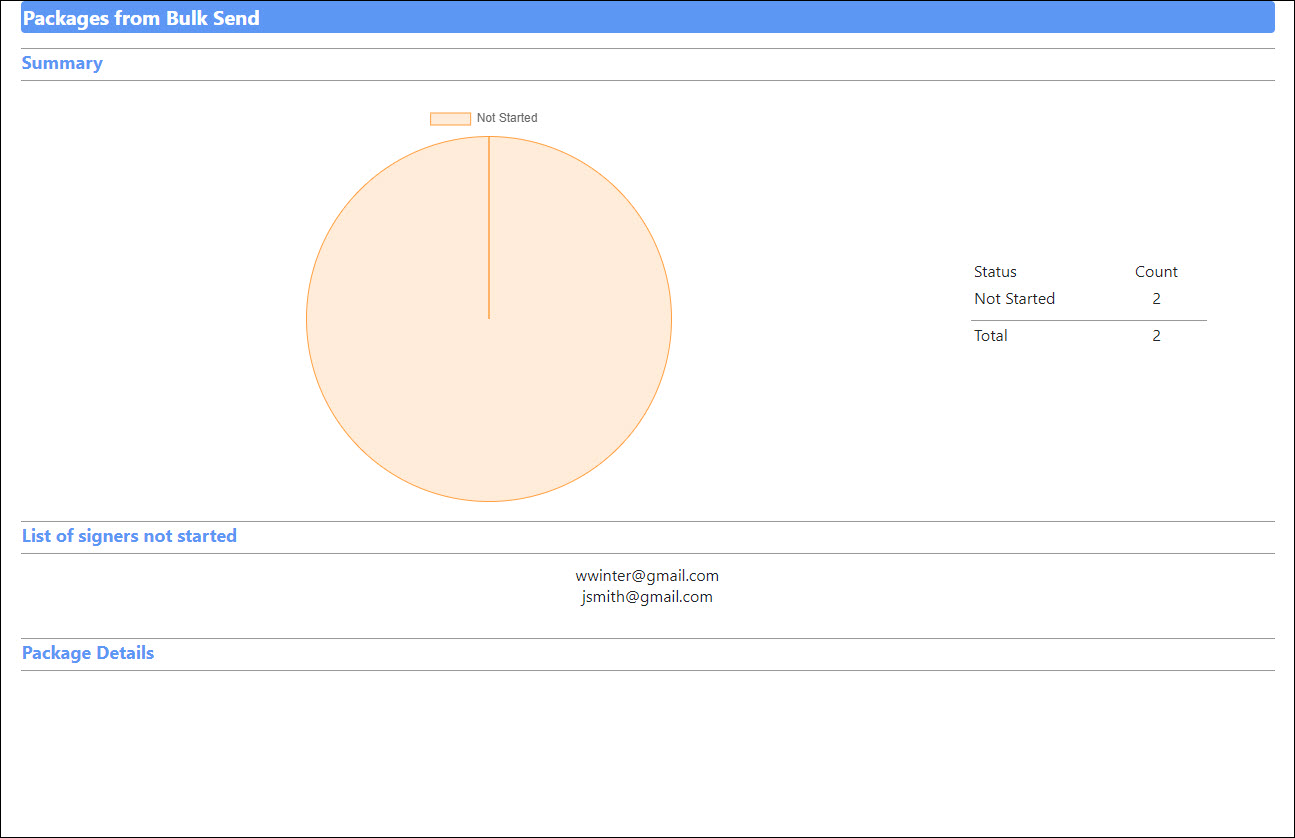
To see the number of signers who have yet to complete signing for a specific bulk send, click the corresponding Package Statuses icon ![]() . A report for the bulk send is displayed showing the number of members who have completed signing and the number of members who have not signed.
. A report for the bulk send is displayed showing the number of members who have completed signing and the number of members who have not signed.
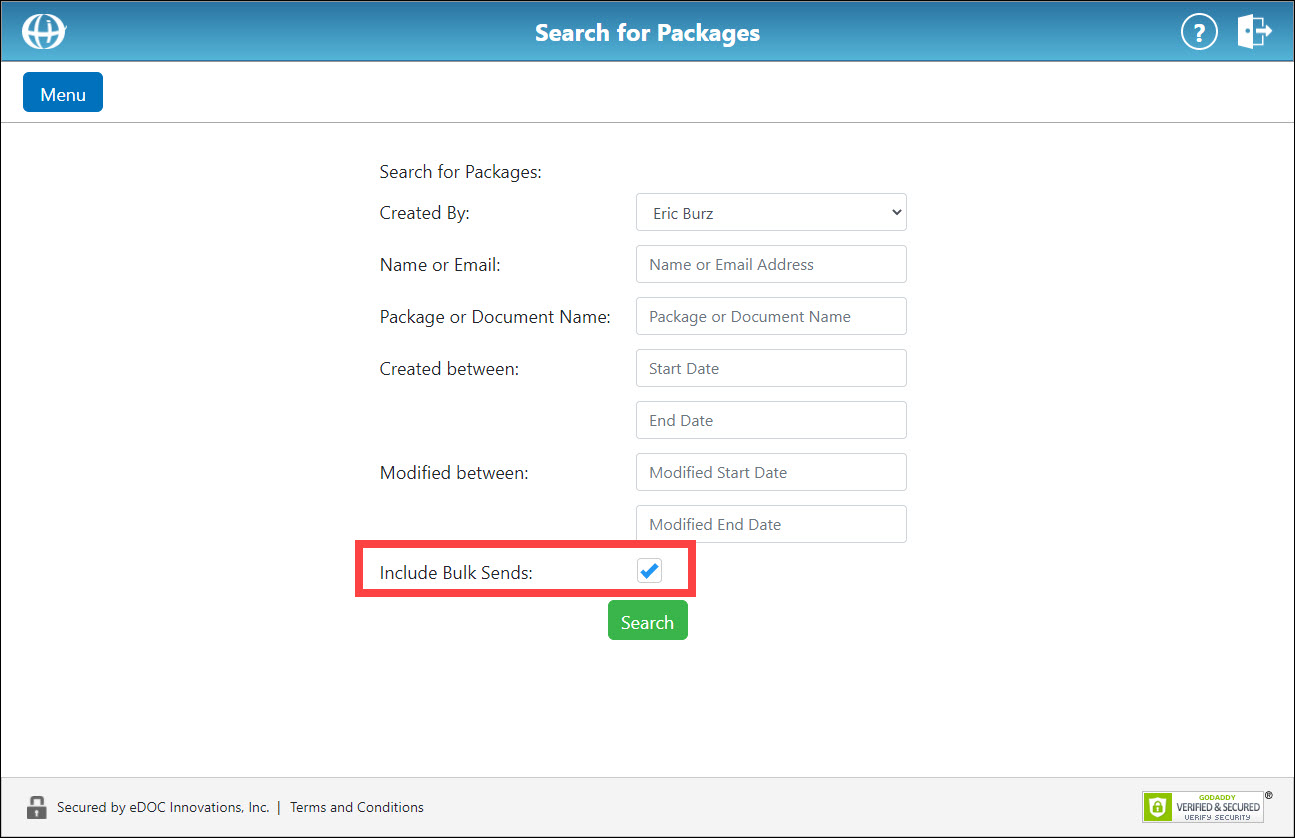
When viewing packages on the Package Results screen, you can choose to include bulk sends in your list of packages. On the Search for Packages screen, check the Include Bulk Sends box.
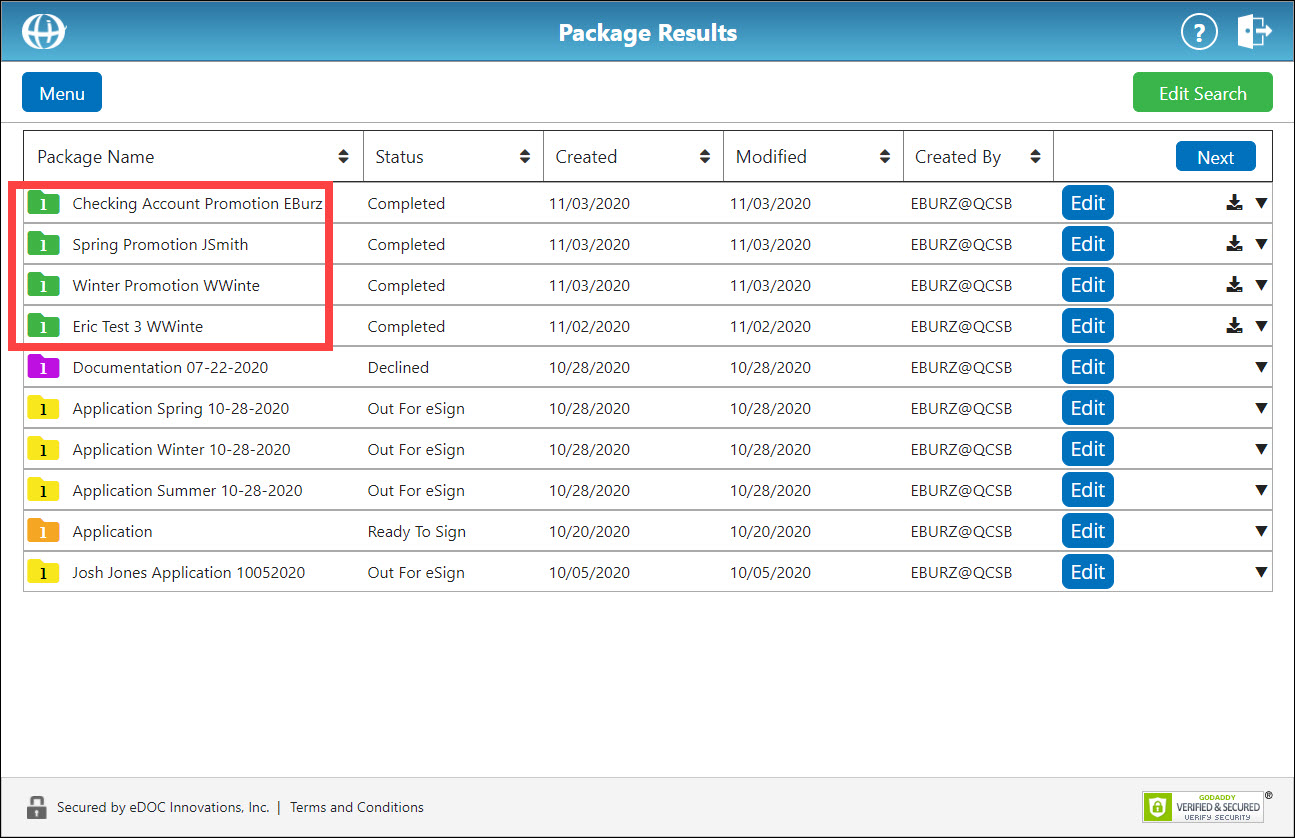
When package search results are returned, packages created from bulk send jobs will also be included. The name of a bulk send package will be the name of the bulk send job followed by the first letter of the signer’s first name, and the first several characters of the signer’s last name:
