Scan and Deposit Items

CheckLogic Biz allows you to scan and deposit multiple items at one time using a Canon CR-L1 scanner. Before scanning items into the system, you must declare an item count (i.e. number of checks) and total amount (i.e. total dollar amount of checks being submitted).
Once you have scanned the desired items into the system, the Declared Item Count must match the Actual Item Count, and the Declared Total Amount must match the Actual Total Amount. You can click on individual items to review or fix items that require attention. When both sets of numbers match, you can then submit the items to your institution for deposit.
Scan and Deposit ItemsScan and Deposit Items
Note: Before beginning the scanning and depositing process, ensure that your scanner is plugged in, powered on, and updated to the latest available firmware.
- Click the Scan Items tab. The Scan Items screen appears.
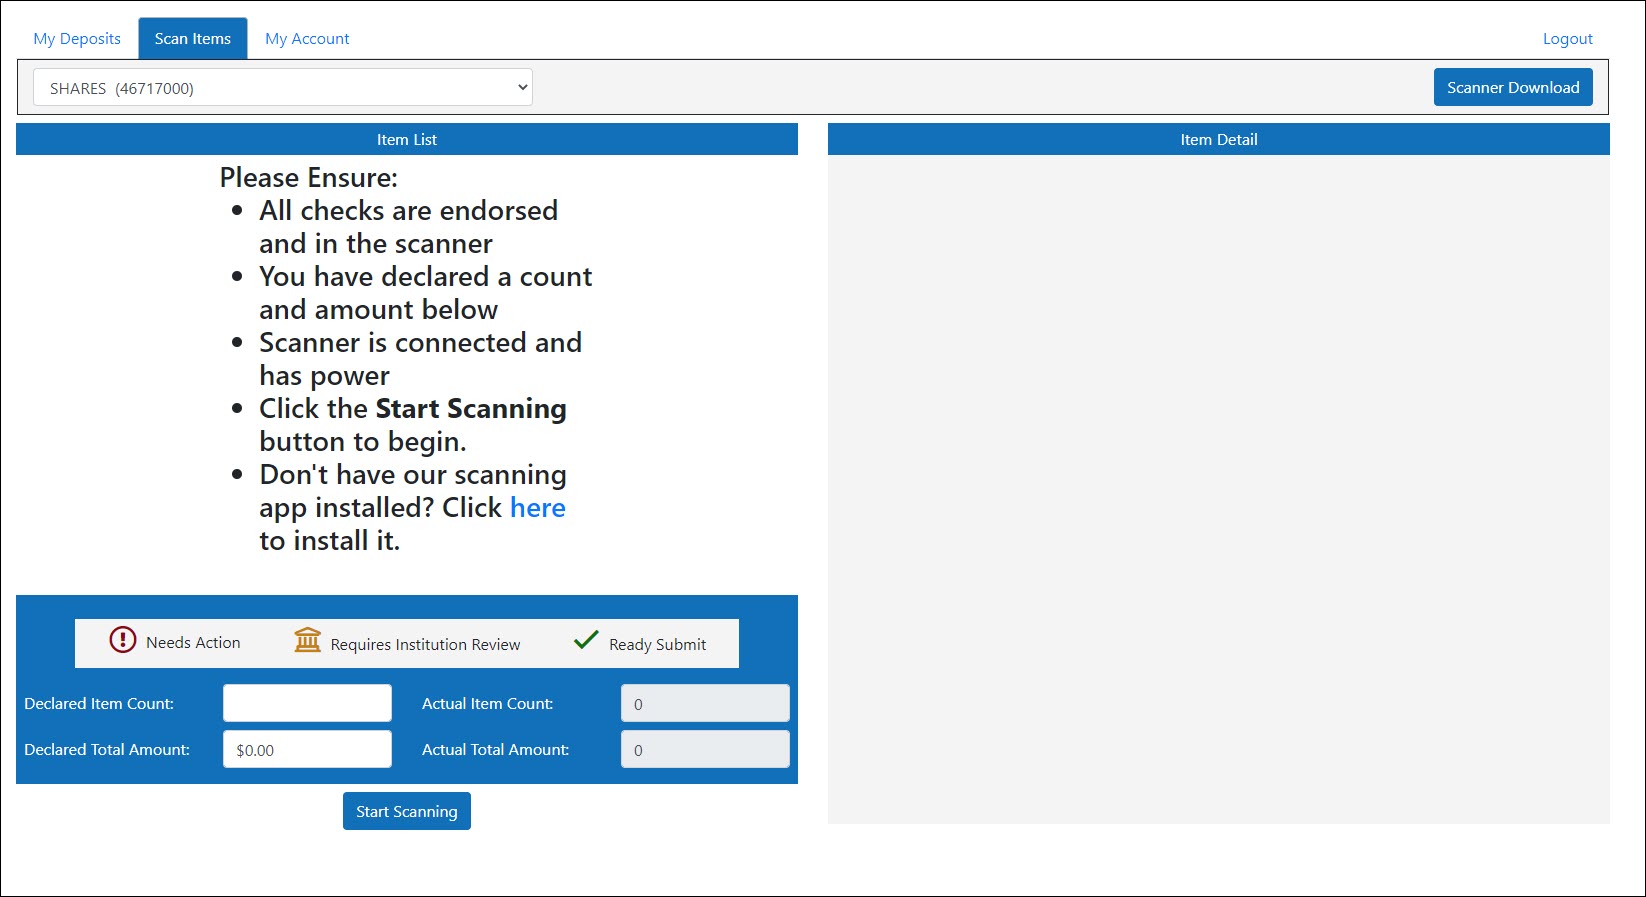
- From the account drop-down list at the top of the screen, select the account to which you would like to deposit items.
- If this is your first time scanning items using CheckLogic Biz and you have not yet installed the CheckLogic Biz Tray Application, you must install the scanning application before any items can be scanned. For instructions on how to install the CheckLogic Biz Tray Application, click here.
- In the Declared Item Count box, enter the number of items you want to scan.
- In the Declared Total Amount box, enter the total dollar amount of all the items you want to scan.
- Insert the items you want to scan into your scanner. Ensure all items are facing the correct way.
- Click Start Scanning. The Open CheckLogic Biz Tray App window appears.
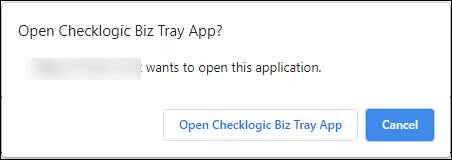
- Click Open CheckLogic Biz Tray App. The item scanning process automatically begins.
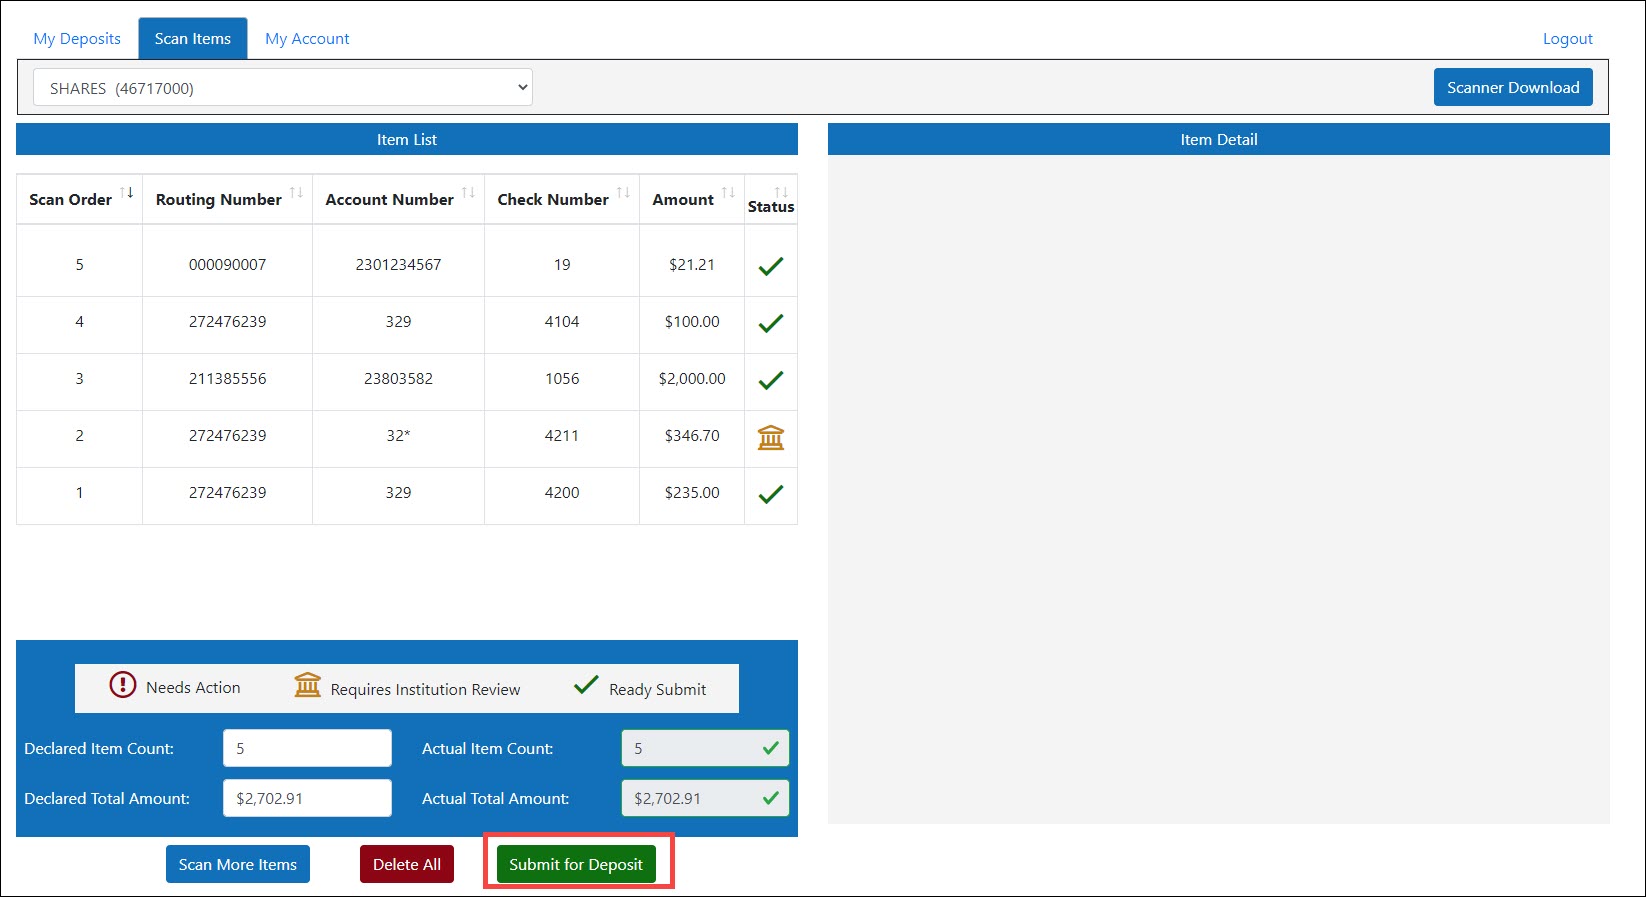
- When scanning is complete, each item appears as an individual line item in your Item List. The Actual Item Count and Actual Total Amount boxes show the total number of items that were actually scanned and the total dollar amount of those items:
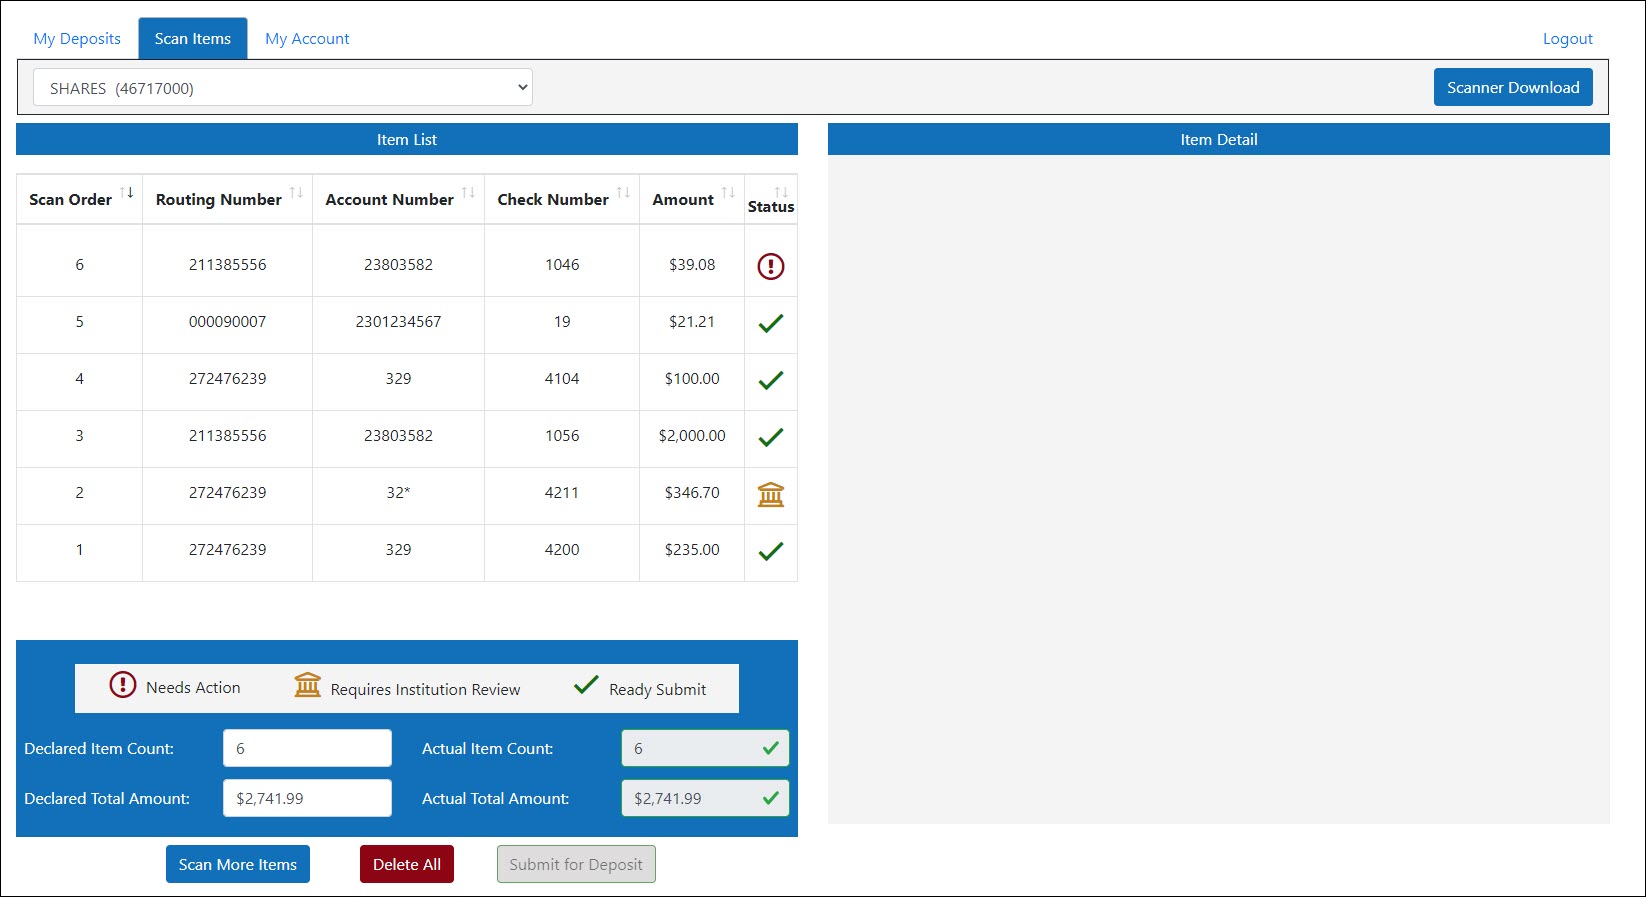
In the Status column, the current status of each scanned item is shown.
 Ready Submit – The item is ready to be submitted for deposit.
 Credit Union Review – The item can still be submitted for deposit, but your institution must review the item before the deposit is accepted. A common reason for seeing this status is the item is over the acceptable dollar amount defined by your institution.
  Needs Action – The item cannot be submitted for deposit until you take action on the item.
- To submit the items for deposit, the Declared Item Count must match the Actual Item Count, and the Declared Total Amount must match the Actual Total Amount. Items that are in a Needs Action status must be addressed before the batch can be submitted.
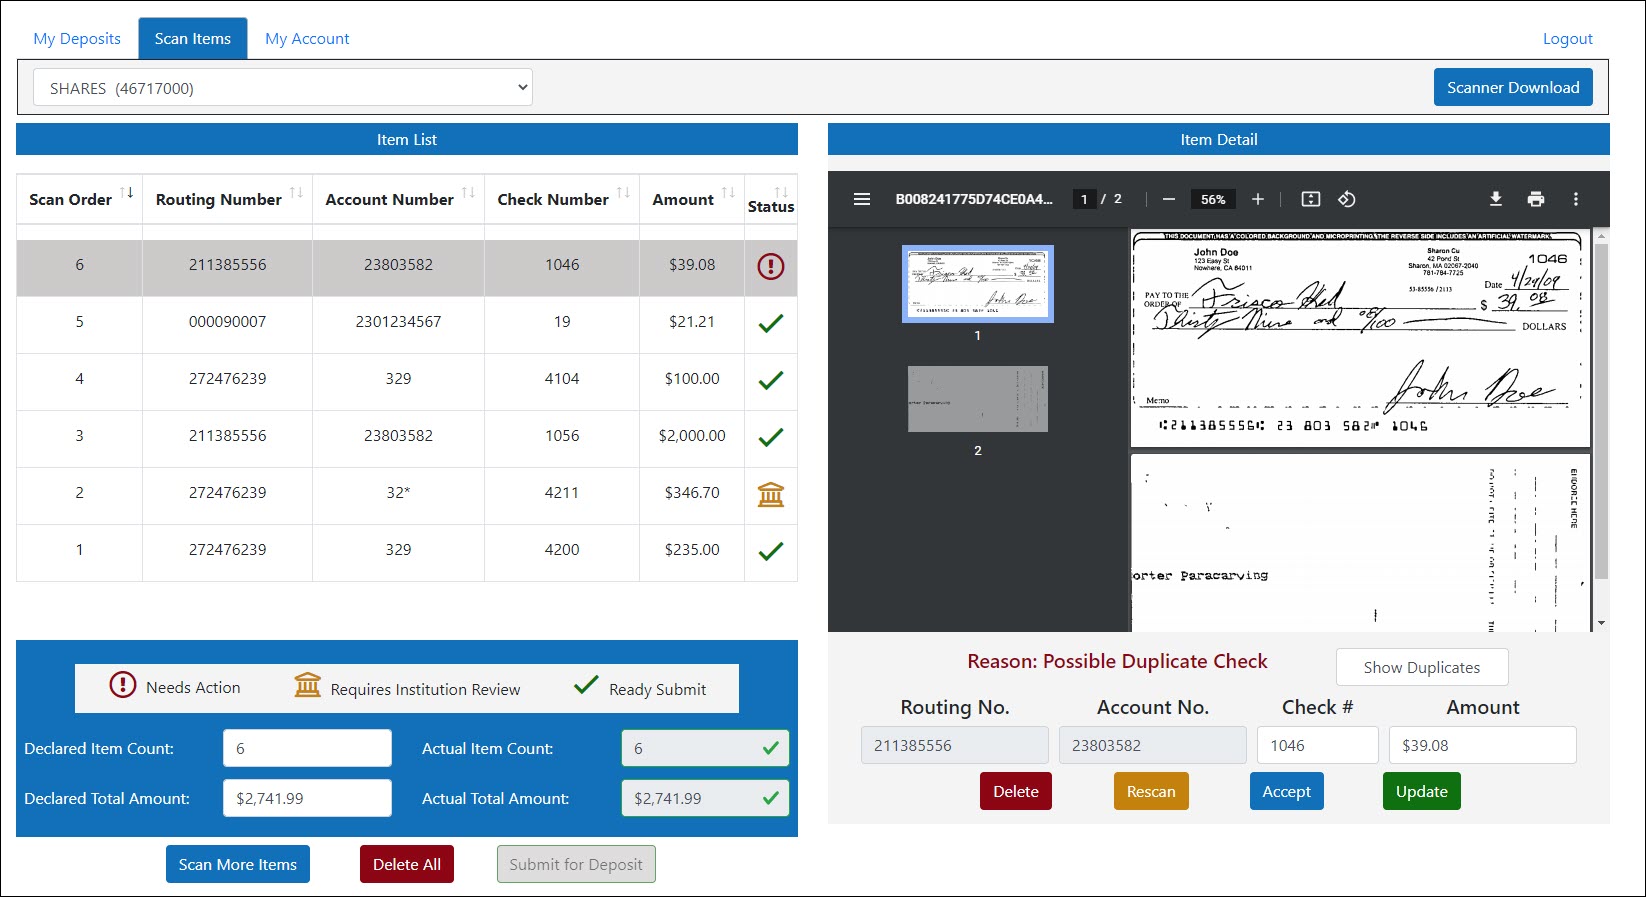
- To select a specific item, click on that item in the Item List. In the Item Detail box, an image of the item appears.
At the top of the window, a set of icons appears to zoom in or out
  on the item, fit the item to the page
  , rotate the item counterclockwise
  , download a copy of the item
  , or print the item
  .
.
At the bottom of the window, the routing number, accounting number, check number, and dollar amount of the item is shown. If the item has a status of Credit Union Review or Needs Action, the reason why the item was not immediately accepted (i.e. "reject reason") is also shown.
Hide Reject Reasons DescriptionsView Reject Reason Descriptions
- Unable to Read Check Information – Some information on the item, such as the MICR or Routing Number, could not be read. Try rescanning the item.
- Poor Image Quality – The item's scanned image failed Image Quality Analysis, or there is an error with the image format (invalid image size, invalid image header, etc.). The item must be rescanned.
- Invalid Check Number – The item's serial number is blank, contains invalid characters, or is too long.
- Invalid Amount – The dollar amount of the item is blank, or the item has a zero-dollar amount.
- Item is over Limit – The item's dollar amount is over the limit as defined by your institution.
- Exceeds Maximum Daily Limit – You have exceeded the maximum daily dollar amount or maximum number of items per day that can be deposited as defined by your institution.
- Exceeds Maximum Monthly Limit – You have exceeded the rolling 30-day deposit amount limit as defined by your institution.
- Not Endorsed Properly – No signature endorsement was detected on the item.
- Possible Duplicate Check – The item appears to be a duplicate of a previously scanned item.
- Other – Your account requires manual review by your institution. This may be caused by a possible duplicate item that was detected in another account.
- Customer Edited – The item's check number or dollar amount has been edited by you, the customer. You can still submit the item, but your institution must review it before it can be deposited.
- For each item that has a Credit Union Review or Needs Action status, click on the item.
In the Item Detail box, in the Check # and Amount boxes, ensure the correct check number and dollar amount are listed. If not, enter the correct check number and dollar amount into each box and click Update to update the item.
Use the corresponding buttons to Delete an item, Rescan an item, or, if applicable, Accept the item as it is currently listed. - When all items in a Needs Action status have been addressed, the Submit for Deposit button illuminates at the bottom of the Item List:
- To scan more items into the system, click Scan More Items.
To delete all items currently on the Item List, click Delete All. - When you have finished scanning and addressing items, click Submit for Deposit. Depending on the status of the items you submitted, a message appears stating that the items were deposited successfully or are currently in review by your institution:

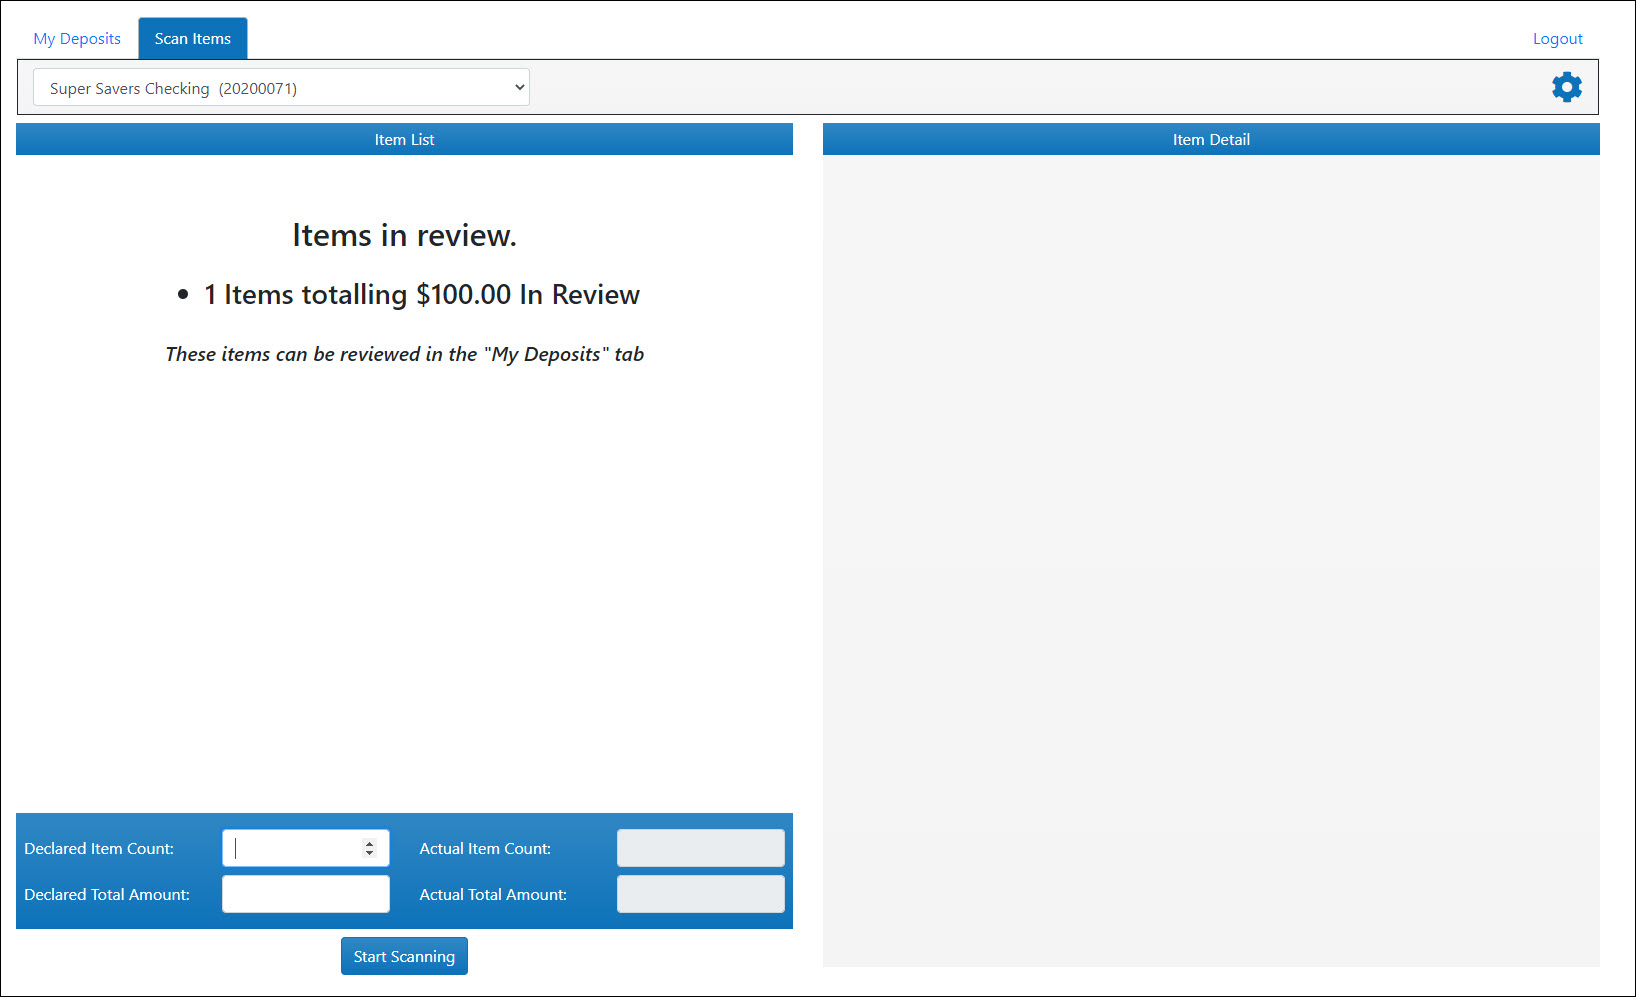
You can view the current status of your submitted items as they are processed through the system by your financial institution from the My Deposits tab.