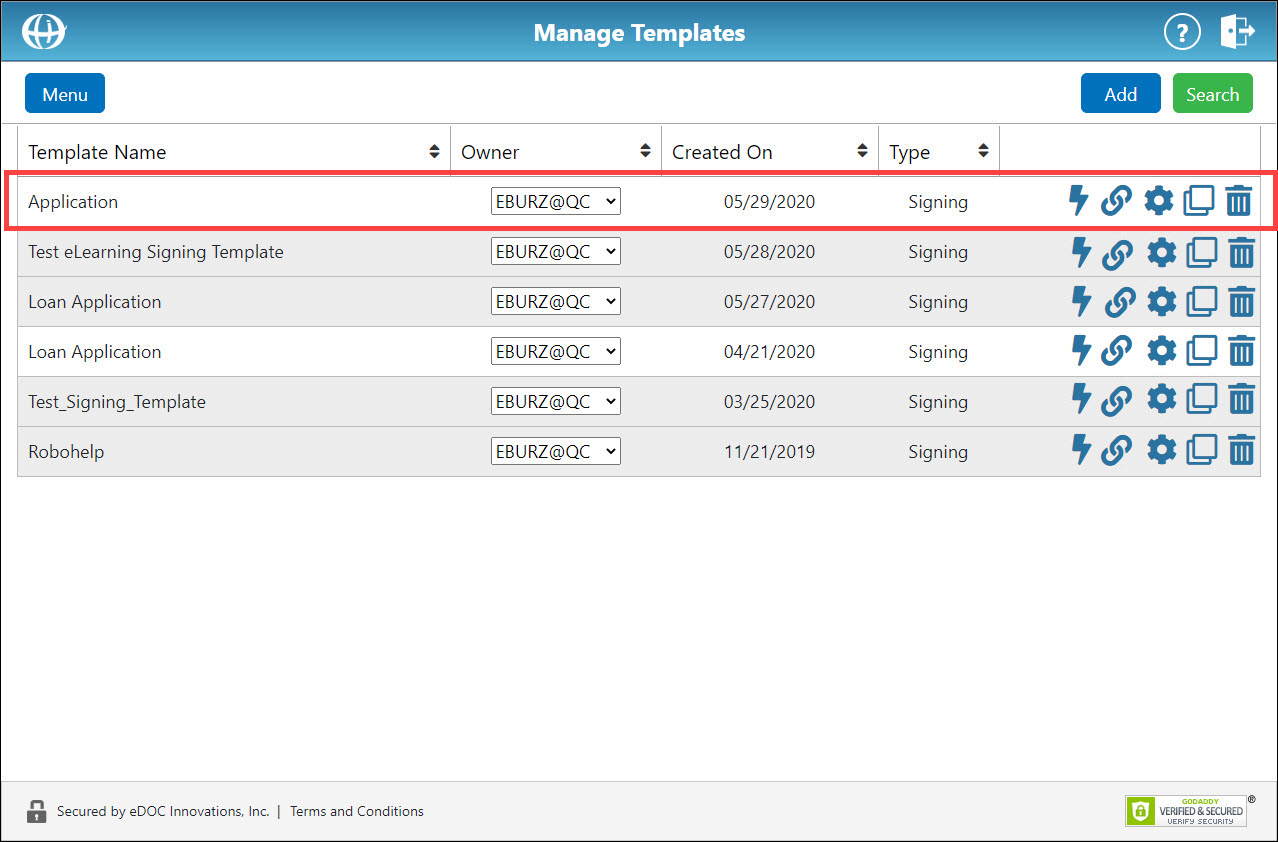
Manage Templates

You can delete, edit, or clone existing templates. Template links  enable you to embed templates of any type into your website to create self-service forms for your members.
If a self-service form has been created from a template, you can transfer ownership of a template to change the user from whom corresponding email notifications are sent. This also changes the user who receives the final email notification when a self-service form is completed.
Template Form Recognition
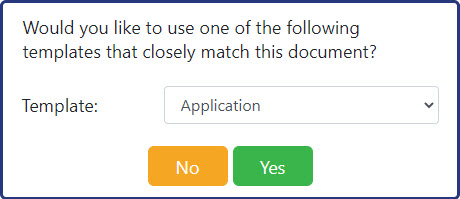
When uploading new signing documents as part of a package, eDOCSignature automatically searches for signing templates that closely match the uploaded document and asks if you would like to apply the matching template to your document:
On the Manage Templates screen, templates set up for form recognition are listed in white while templates not currently set up are listed in gray:
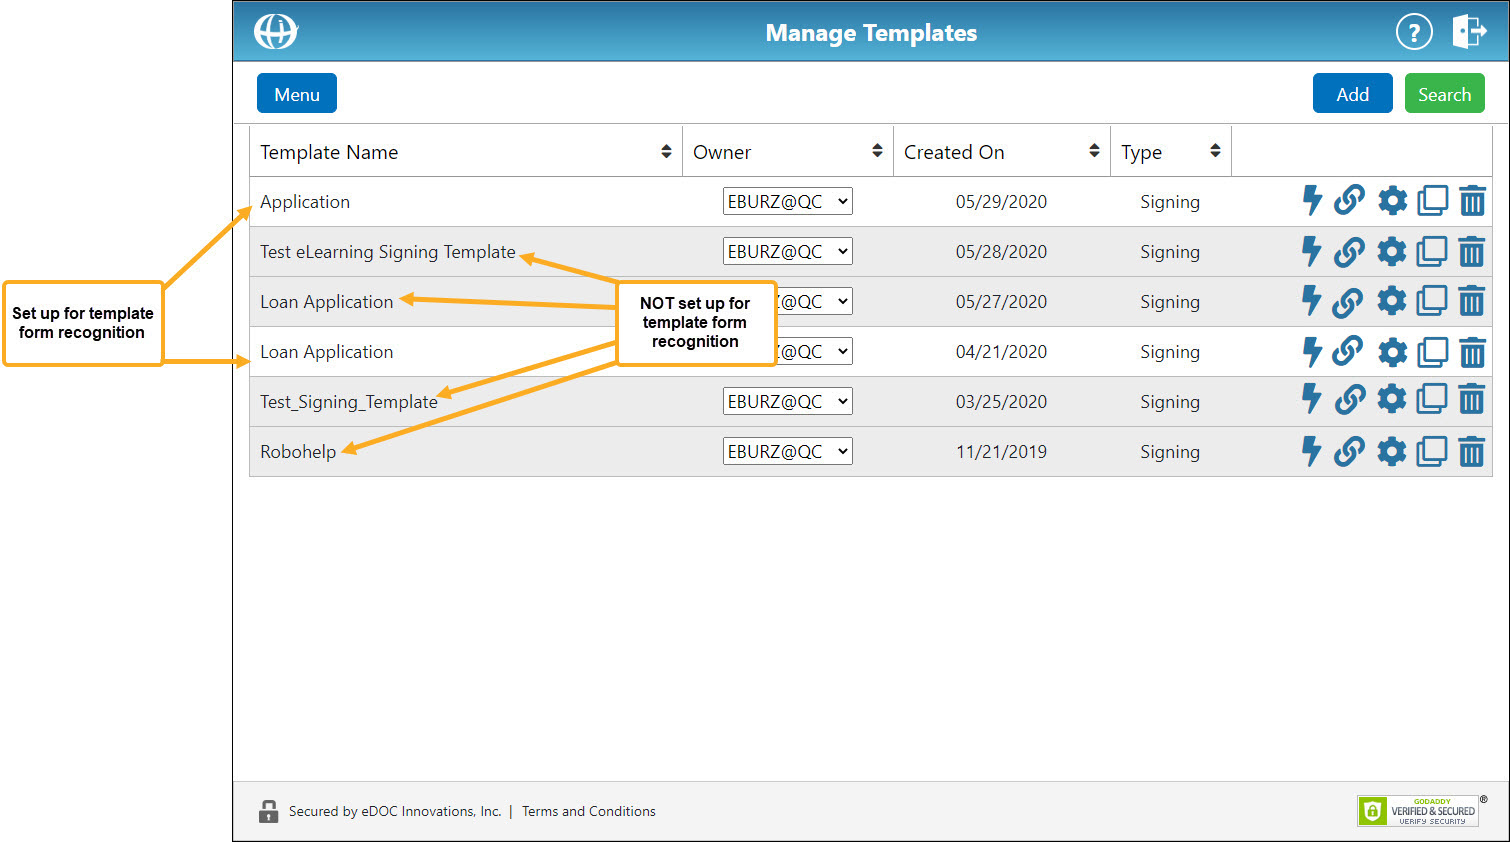
This is a new feature in eDOCSignature as of August 2020. Any signing templates created after that time are already set up for template form recognition. Any signing templates created before that time need to be modified before they are set up for template form recognition. For instructions on setting up a signing template for form recognition, click here.
Delete a TemplateDelete a Template
From the Manage Templates screen, for the template you want to delete, click the corresponding trash can icon ![]() . The template is removed from the system.
. The template is removed from the system.
Edit a Signing TemplateEdit a Signing Template
Note: You can only edit signing templates. To edit a reference or requested template, you must delete the template and create a new template in its place.
- To edit a signing template's events, from the Manager Templates screen, click the corresponding Events icon
 . The Events window appears.
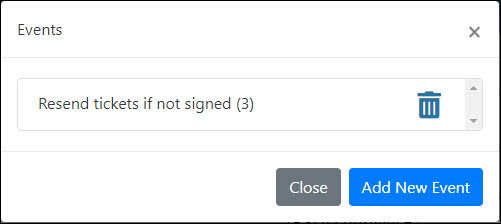
If any events have already been applied to the template, they are listed.
To delete an event, click the event's corresponding trash can icon .
.
To add additional events, click the Add New Event button. - To edit a signing template's signing elements, from the Manage Templates screen, click the corresponding gear icon
 . The Edit Template screen appears.
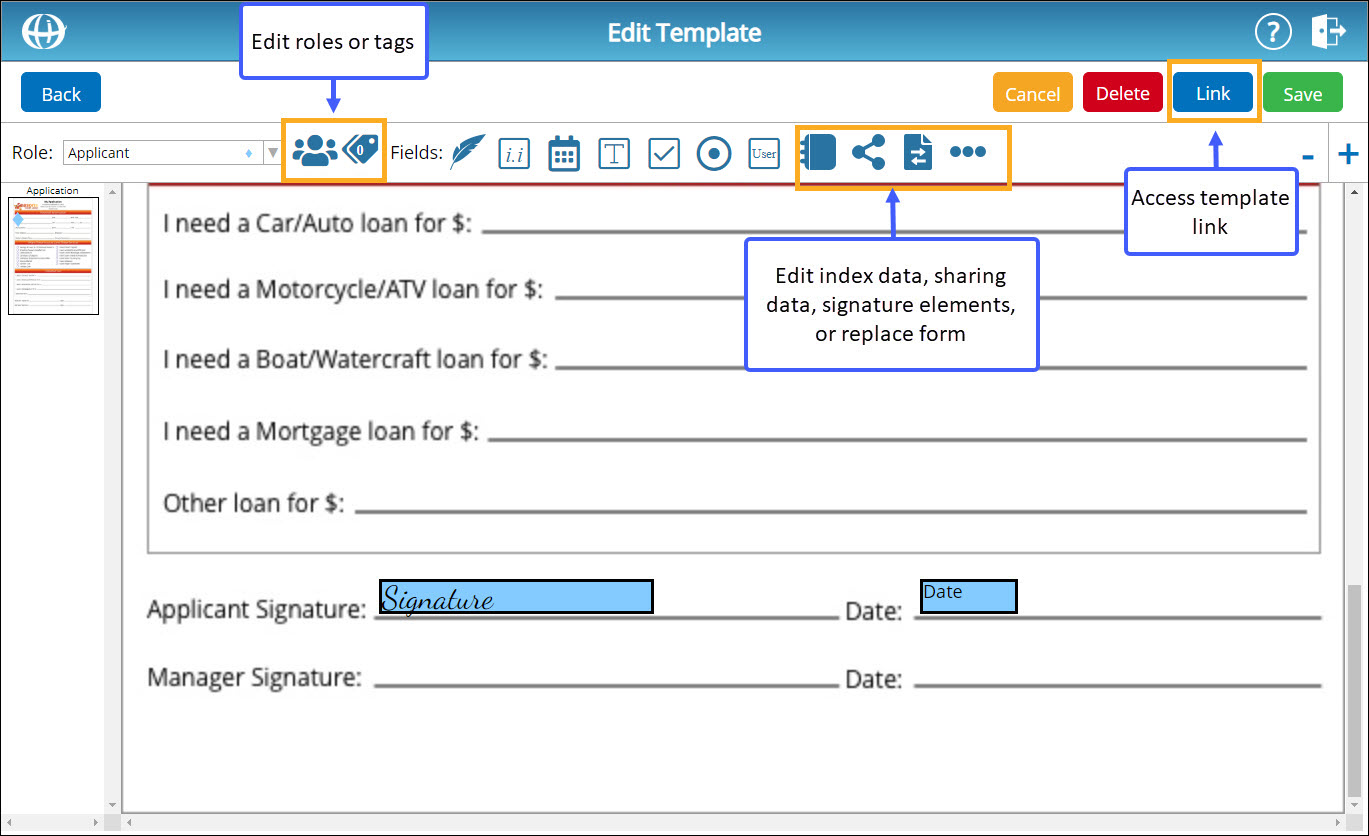
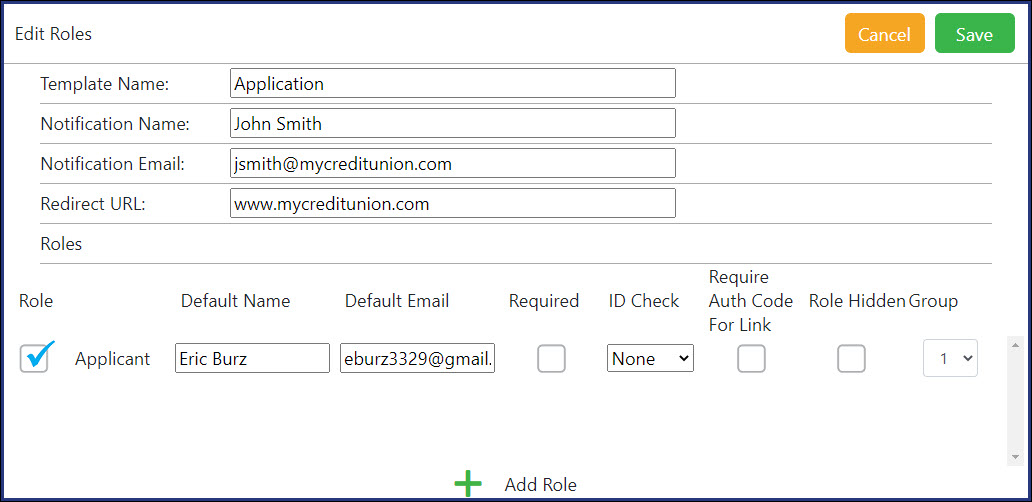
The Edit Template screen is similar to the Set Up Template and Set Up Document screens used during the Set Up Template and Send Document processes. It contains seven additional options: Edit Roles, Edit Tags, Edit Index Data, Edit Sharing Data, Replace Form, Edit Signature Elements, and Access Template Link. - To edit roles associated with the template, click the Edit Roles icon
 . A new window appears with options to add, delete, and edit template roles. The template name, notification name, notification email, and redirect URL can also be changed from this window.
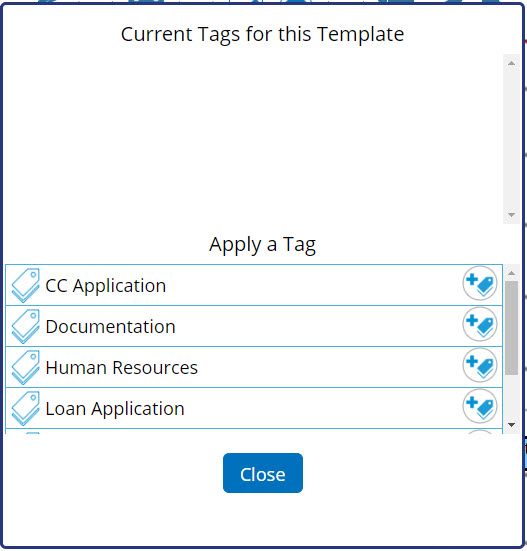
- To edit tags associated with the template, click the Tags icon
 . A new window appears with options to apply or remove existing template tags.
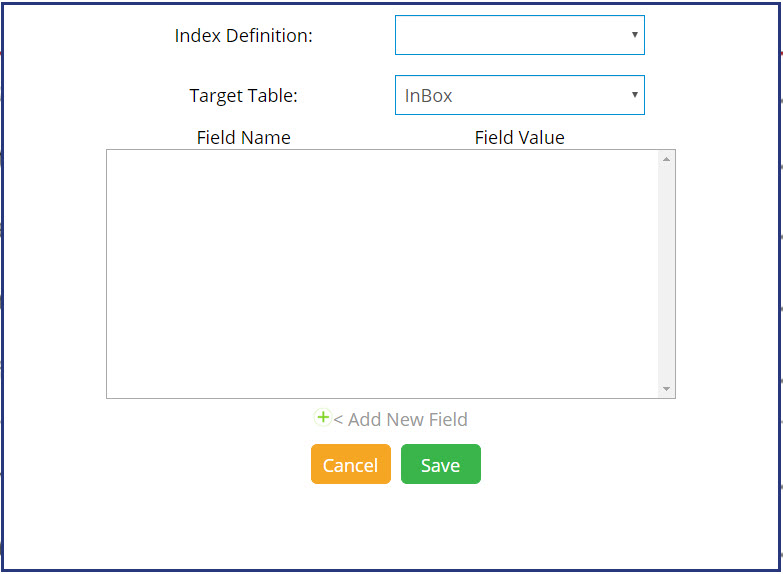
- To edit index data associated with the template, click the Edit Index Data icon
 . A new window appears with options to add, remove, or modify index data.
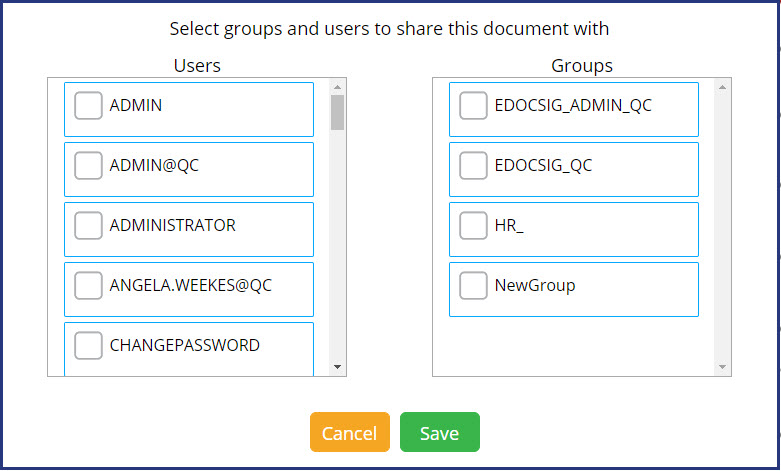
- To edit sharing data associated with the template, click the Edit Sharing Data icon
 . A new window appears with options to add or remove users/groups with which the template is shared.
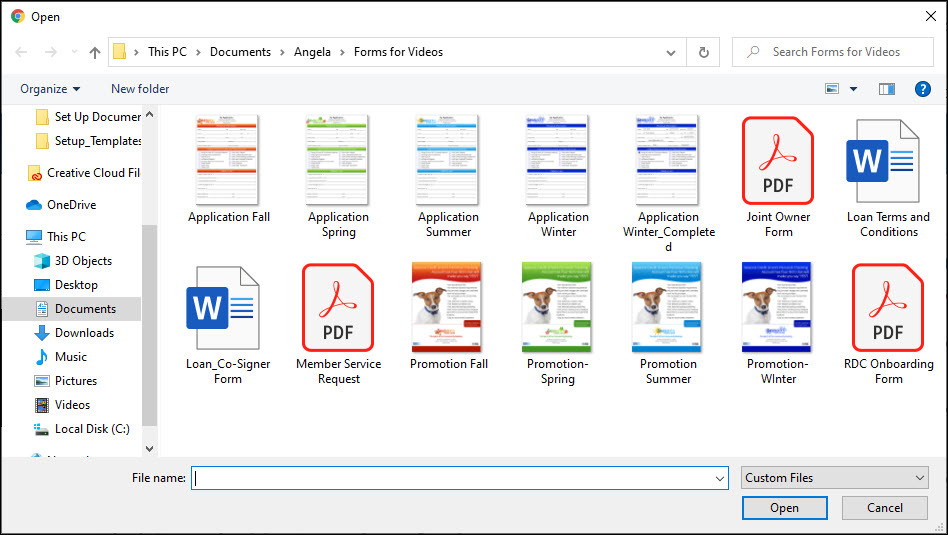
- To replace the document (i.e. "form") being used for the template, click the Replace Form icon
 . A file explorer opens to select a new document for the template.
- To simultaneously edit all elements associated with the template from a single table, click the ellipsis
 . A new window appears displaying a table that contains every signing element currently on the template.
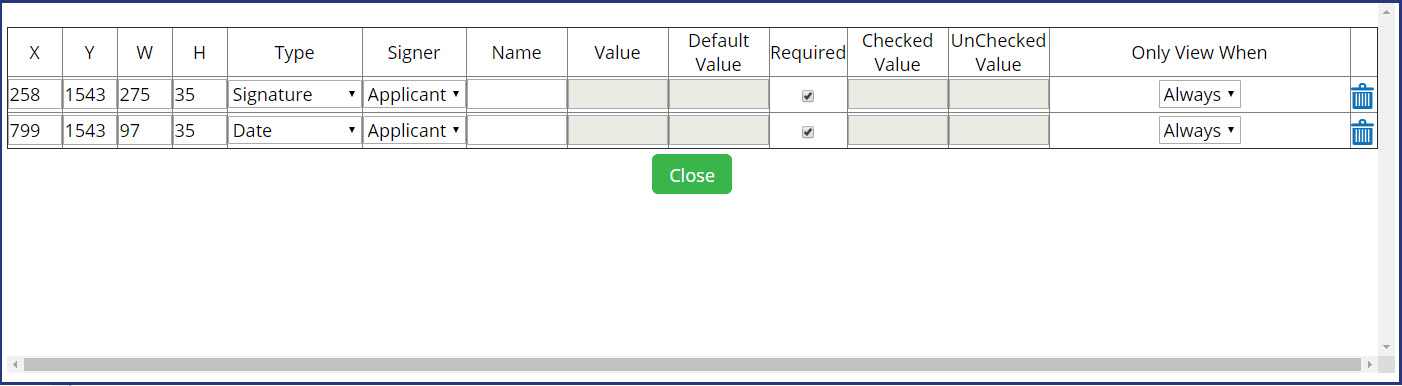
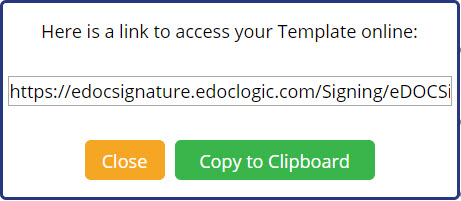
Each row in the table contains information for an individual signing element. Using the table, you can set an element's location, type, name, value, required/optional status, checked/unchecked value (if applicable), and view status. You can also use it to align multiple signing elements at one time. - To view the URL at which you template can be accessed online, in the top-right corner of the screen, click the Link button. A new window appears displaying the URL. For more information on how this link can be used to create a self-service form, click here.
Clone a TemplateClone a Template
Note: You can only clone signing template. Reference and requested document templates cannot be cloned.
- From the Manage Templates screen, for the template you want to clone, click the corresponding clone icon
 . A new window appears requesting that you select a document to use for the template clone.
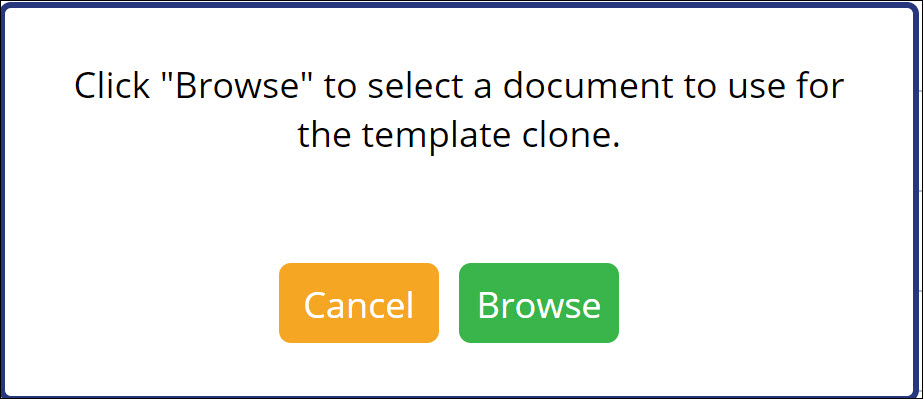
- Click Browse. Using the file explorer that appears, find the document you want to use for the template clone and select it. A new window appears.
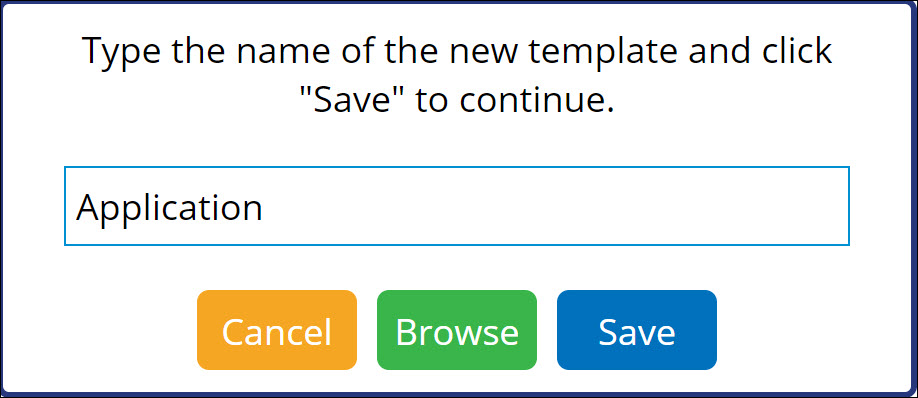
- In the new window, enter a name for the template.
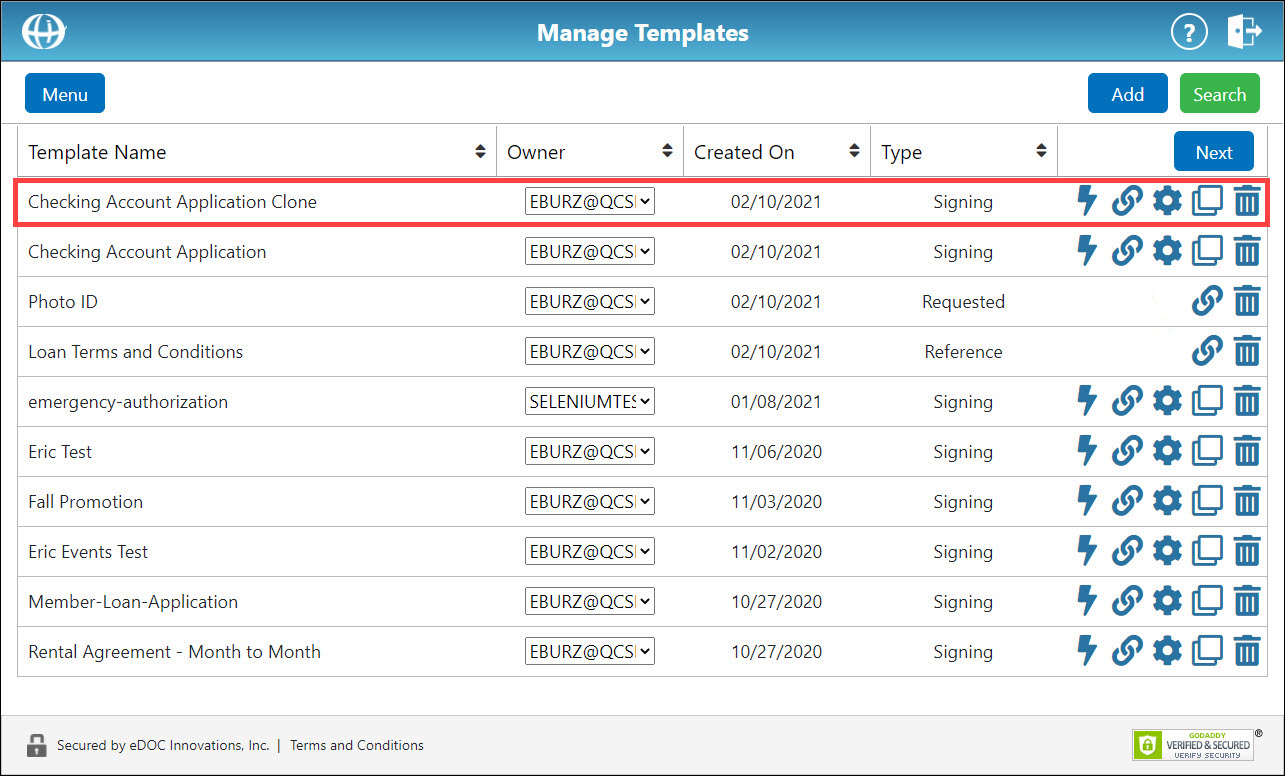
- Click Save. The template is added to the list of templates on the Manage Templates screen.
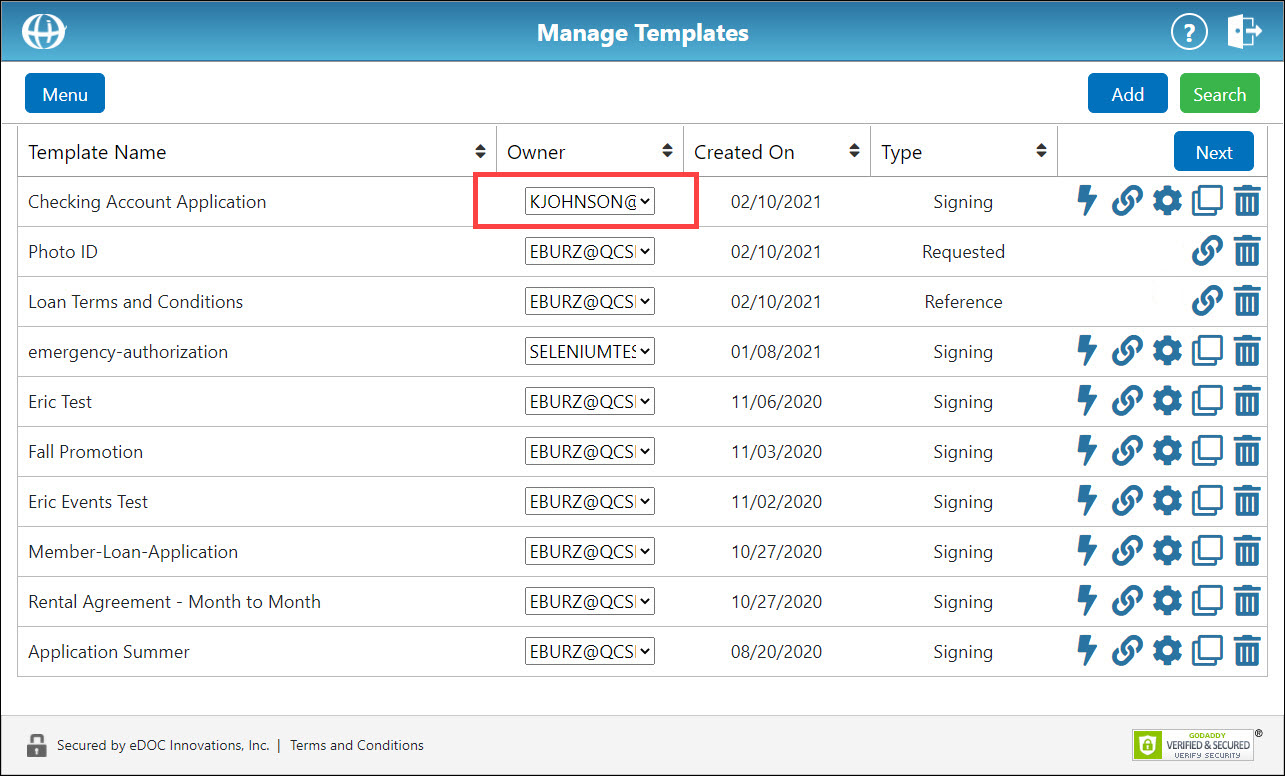
Transfer Template OwnershipTransfer Template Ownership
Once template ownership has been transferred, the template will appear in the new owner's template search results.
- From the Manage Templates screen, find the template for which you want to transfer ownership.
- From the Owner drop-down list, select a new template owner.
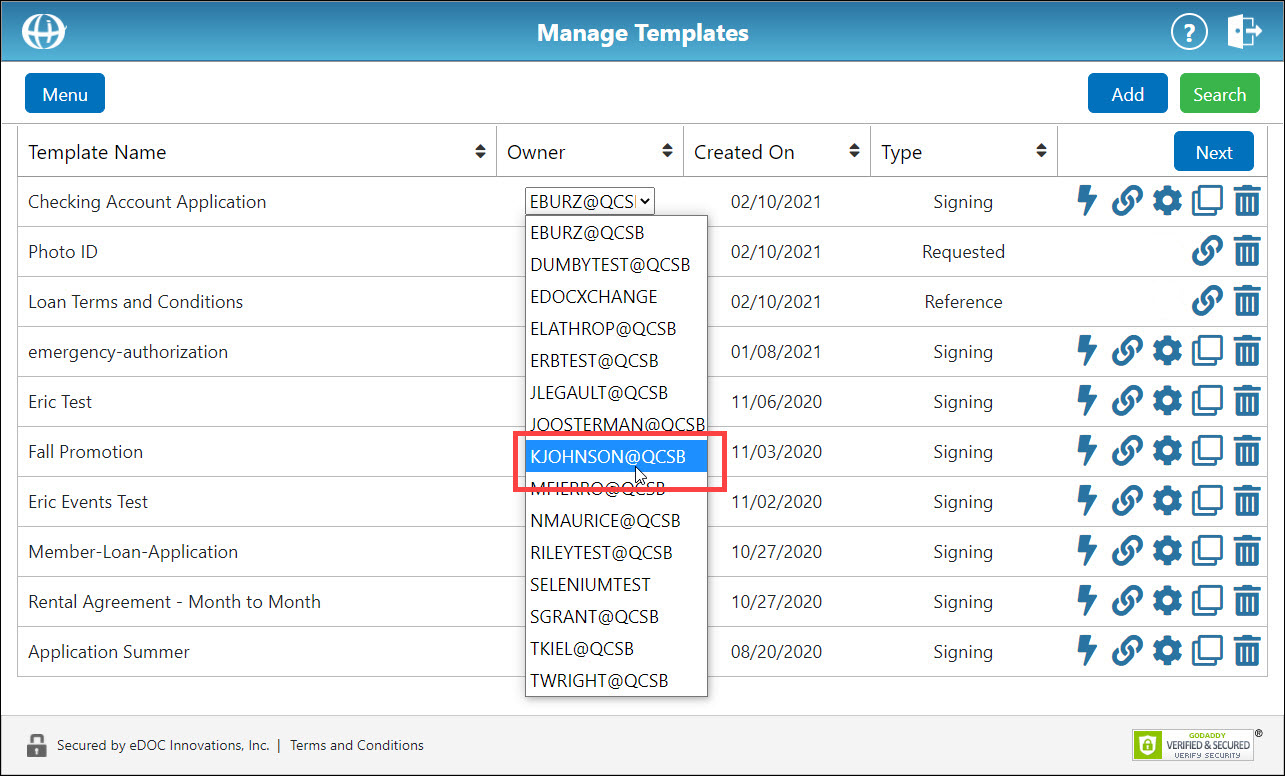
- In the confirmation box that appears, click Yes. Ownership of the template is transferred to the selected user.
Set Up Signing Template for Form Recognition Set Up Signing Template for Form Recognition