Review Documents
The Review Document Information screen allows you to review a package before sending it out for signing. You can modify any of the signer, viewer, indexing, or sharing data currently associated with the package.
From the Review Document Information screen, you have the option to send a package for signing (i.e. send an email notification to the signer), or save a package to be sent later using the Manage Packages screen. You can also immediately launch the signing process from your current computer or generate a direct URL for the package's signing pages using the Sign Now button in the top-right corner of the screen.
Forced Signer Name Option
During the signing process, a signer has the opportunity to enter their name and initials before adopting a personalized signature. If you would like signers to use the name(s) you entered on the Select Signers screen, you can enable the Forced Signer Name option by checking the Force signers to use the names above as signatures box.
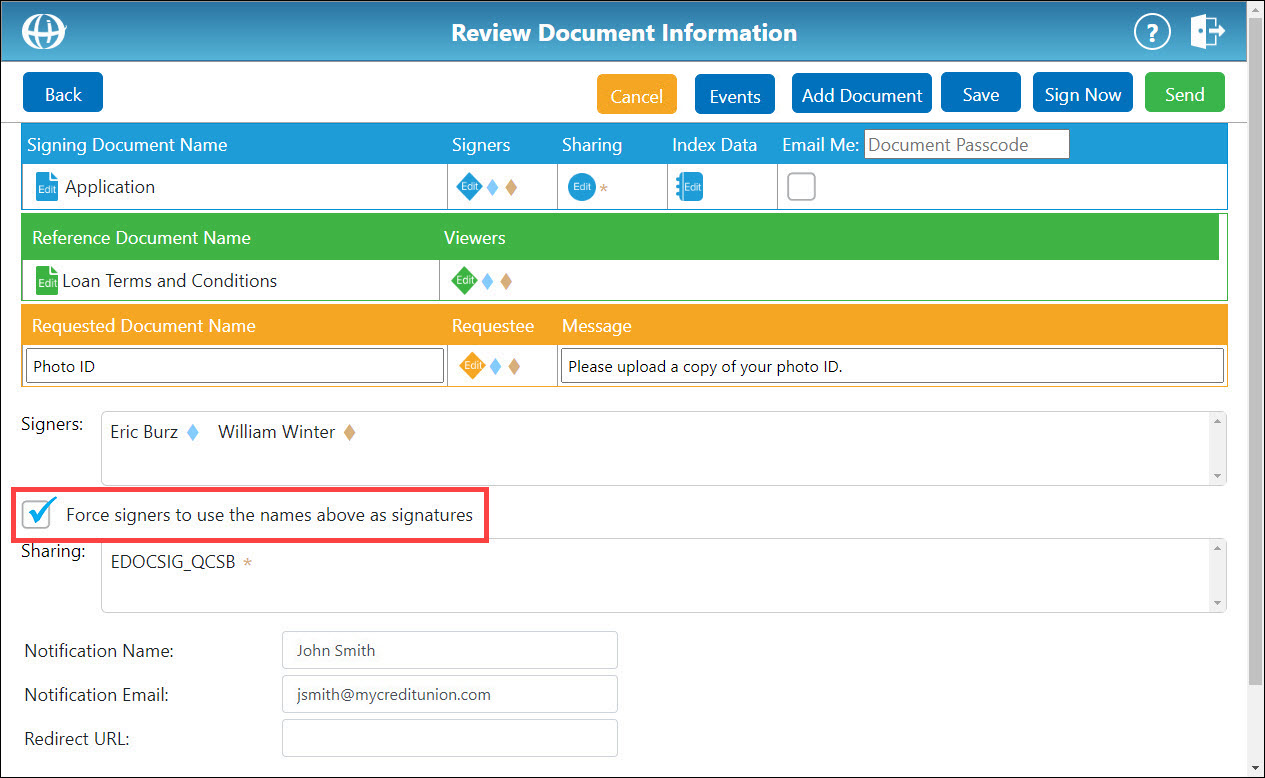
Review Document(s) in a PackageReview Document(s) in a Package
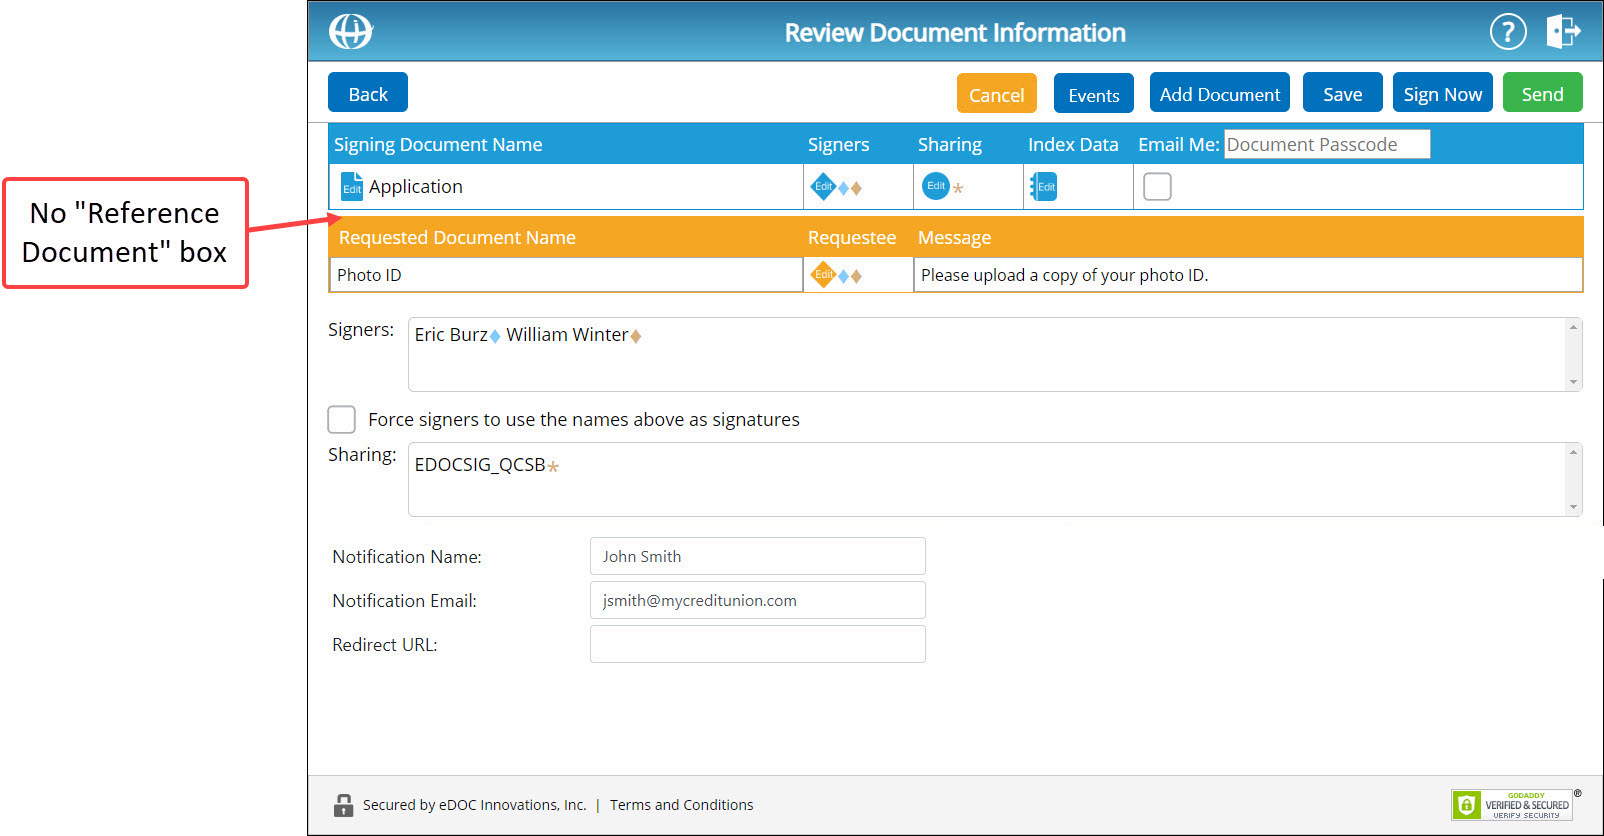
There are three main boxes on the Review Document Information screen: Signing Document Name, Reference Document Name, and Requested Document Name. If no document of a specific type is included in the package, that box will not appear on the Review Document Information screen. For example, if no reference documents are included in the package, the Reference Document Name box will not appear (as shown below).
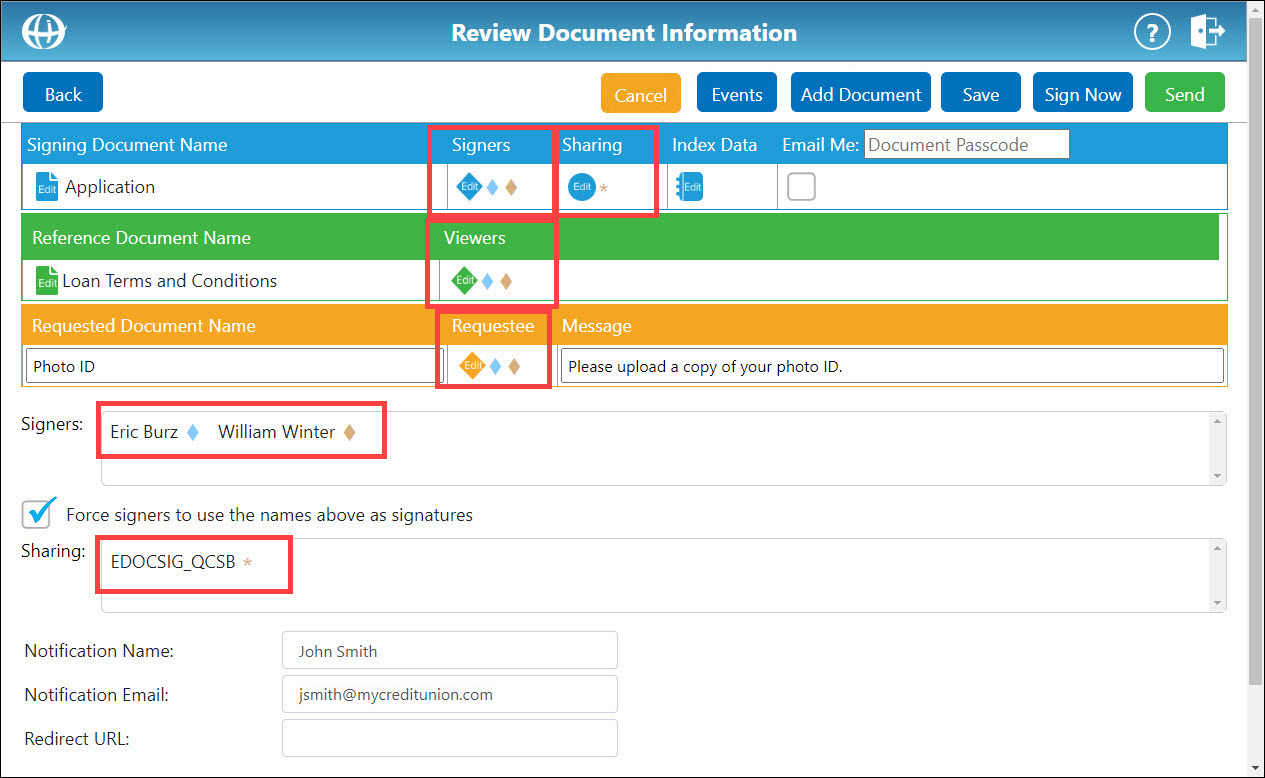
Below these boxes, there are two additional windows: Signers and Sharing. The Signers window shows which signers are currently associated with the package. The Sharing window shows which users and groups currently share access to the package. The color-coded "diamond" signer icons ( ) and "asterisk" group icons (
 ) found in these windows correspond with a specific signer or user/group. These icons are displayed beside each portion of a package with which a signer or user/group is associated.
For example, in the screenshot below, both Eric and William are listed as signing document signers, reference document viewers, and requested document requestees. The signing document is being shared with the group EDOCSIG_QCSB.
- To return to the Set Up Document screen for a specific signing document, click on the name of that signing document. The Set Up Document screen for that document reappears.
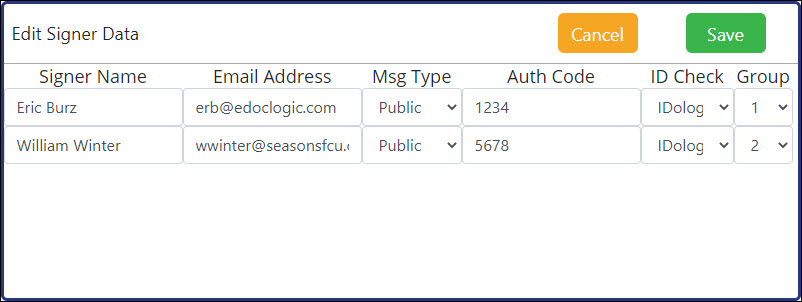
- To edit the signers on a signing document, in the Signers box, click the Edit Signers icon
 . In the Edit Signer Data window that appears, edit the current signer information.
- To edit the users and groups that a signing document is shared with, in the Sharing box, click the corresponding Edit Sharing Data icon
 . The Sharing screen reappears.
 - To edit the index data associated with a signing document, in the Index Data box, click the corresponding Edit Index Data icon
 . The Index Data screen reappears.
 - To receive a copy of the completed document(s) once signed by all parties via email, in the Email Me box, click the corresponding check box.
To encrypt the completed document(s) with a passcode, in the Document Passcode field, enter a passcode. - To edit who can view a reference document, in the Viewers box, click the corresponding Edit Reference Viewers icon
 . The Select Reference Documents Viewers screen for that document reappears.
 - To change the name of a requested document, in the corresponding Requested Document Name field, enter a new name.
To change the messaging to a signer for a requested document, in the corresponding Message field, enter a new message.
To change who wil receive a document request, in the Requestee box, click the corresponding Edit Requestees icon . The Select Requested Document Viewers screen for that requested document reappears.
 - To force signers to use the names listed in the Signers window, check the Force signers to use the names above as signatures box.
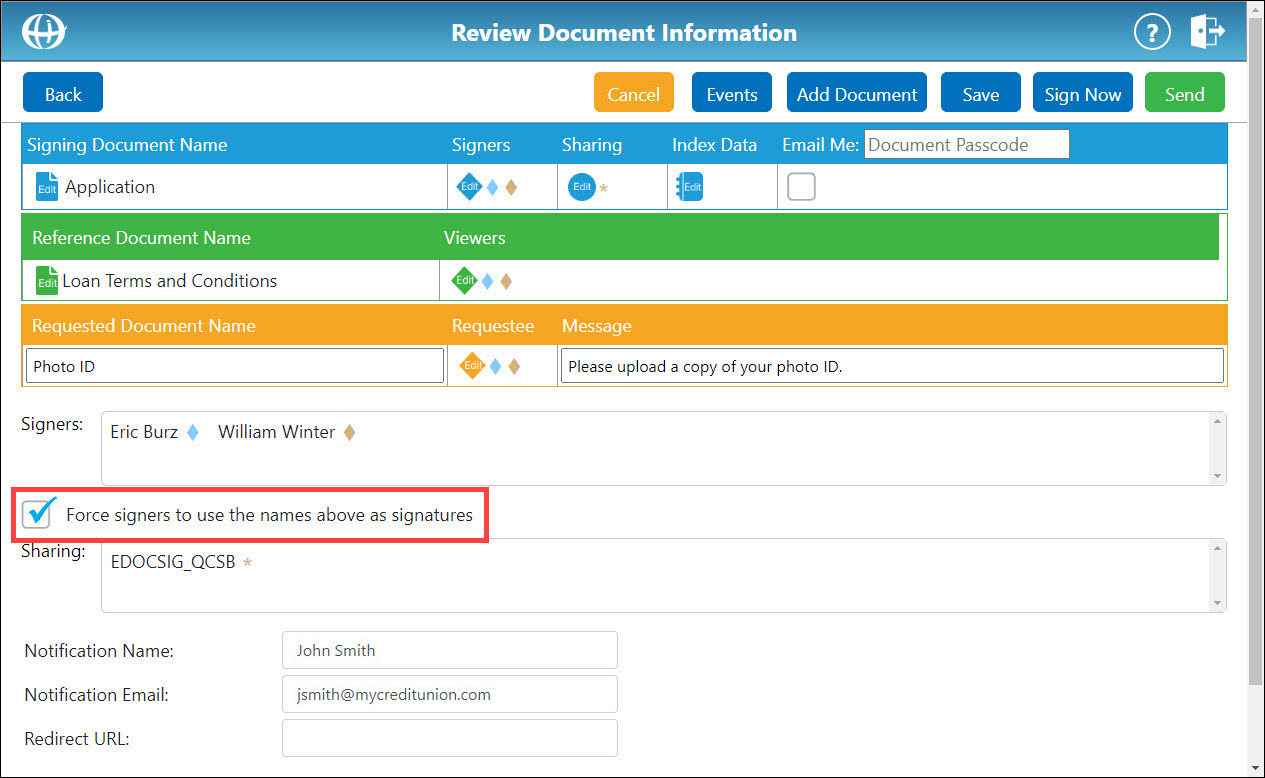
- To change the notification name or notification email associated with the package, in the corresponding box(es), enter a new notification name and/or notification email.
View Notification Name/Email DescriptionView Notification Name/Email Description
If a new notification name or email address is entered on the Review Document Information screen, that new name/email address will receive the final "package complete" email notification in place of the package sender.
- The redirect URL determines the website to which package signers are redirected once they have completed the signing process.
To change the redirect URL for the package type, in the Redirect URL field, edit or enter the redirect URL.
Note: If your redirect URL uses an HTTPS protocol, you do not need to enter the full URL. (e.g. myredirectURL.com).
If your redirect URL uses an HTTP protocol instead of an HTTPS protocol, you must enter the full URL (e.g. http://myredirectURL.com).
- If you have more than one signing or reference document in your package, you can change the order in which signers will see those documents. To reorder a document, click and hold its corresponding arrow icon
 to drag and drop the document up or down the document list.
 - To add an event to the package, click Events. The Add New Event window appears.
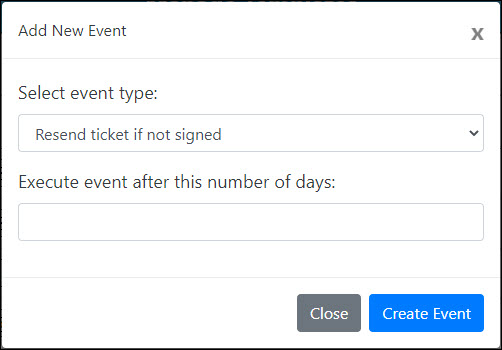
From the Select event type drop-down list, select an event type:
- Resend ticket if not signed – Resends email notification to signer if not signed after the allotted number of days.
- Notify creator if not signed – Sends email notification to package creator if not signed after the allotted number of days.
- Delete package if not signed – Deletes package from the system if not signed after the allotted number of days.
In the Execute event after this number of days field, enter the number of days after which you want the event to occur.
Click Create Event. The Events window appears showing the newly added event. The date and time at which the event will occur are listed beside the event.
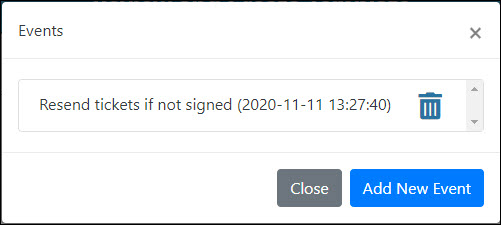
To add additional events, click Add New Event.
To close the window, click Close.
For more information on events, click here.
- To open and sign this package on the current computer, use this package for in-person tablet signing, or generate a direct URL for the package's signing pages, click Sign Now. The Select Signers window appears.
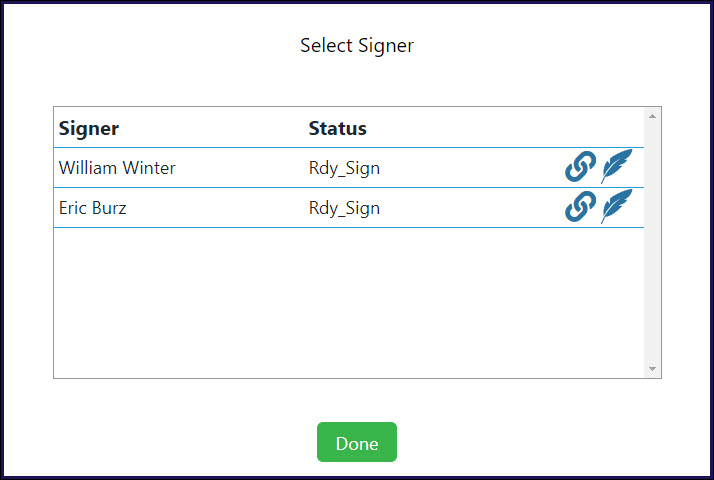
To sign this package on the current computer or use the package for in-person tablet signing, click the Sign Now icon .
.
To generate a direct URL for the package's signing pages, click the link icon .
.
- To cancel the package, click Cancel.
To save the package and return to it at a later time using the Manage Packages screen, click Save. - To return to the Upload Documents screen and add more documents to the package, click Add Document.
- To send the package for signing, click Send. A message appears stating that package has been sent out for signing.