eDOC-It Virtual Printer
The eDOC-It Virtual Printer allows you to send a document or image directly to your eDOCSignature system using the Print function found in most modern browsers and applications. For example, you can send a document created in Microsoft Word directly to eDOCSignature. Once a document has been sent to eDOCSignature using the eDOC-It Virtual Printer, you can use the document to create a signing or reference document, signing template, or send the document for signing using a currently existing template. If you are set up to use Pending Docs, you can also use the eDOC-It Virtual Printer to transfer documents directly to your Pending Docs tab so that they can be added to a package at a later time.
The eDOC-It Virtual Printer can be configured to: 1. immediately send documents for signing, 2. send documents to the Pending Docs tab, or 3. ask the user their preference before each document send. This can be configured by double-clicking the eDOC-It Virtual Printer system tray icon ![]() in the bottom-right corner of your desktop.
in the bottom-right corner of your desktop.
This topic contains instructions on how to use the eDOC-It Virtual Printer. For more information on installing the eDOC-It Virtual Printer, click here.
Configure eDOC-It Virtual Printer SettingsConfigure eDOC-It Virtual Printer Settings
Note: The eDOC-It Virtual Printer system tray icon will only appear in your system tray after a document has been sent to eDOCSignature using the Virtual Printer. If you do not see the system tray icon, send a document to eDOCSignature using the Virtual Printer.
- On the system tray in the bottom right-hand corner of your desktop, double-click on the eDOC-It Virtual Printer system tray icon
 . The eDOC-It Settings window appears.
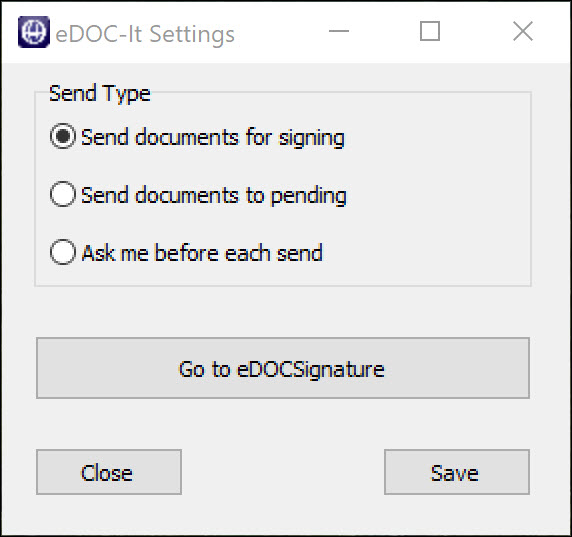
- In the Send Type box, select your preferred Send Type for the eDOC-It Printer:
- Send documents for signing – Each document sent to eDOCSignature using the eDOC-It Virtual Printer can be sent for signing, sent as a reference document, sent using a template, or used to create a template.
- Send documents to pending – eDOC-It Virtual Printer documents are sent directly to Pending Docs tab.
- Ask me before each send – Each time a document is sent to eDOCSignature using the eDOC-It Virtual Printer, you are prompted to Send for Signing or Save in Pending.
When you have finished selecting your preferred Send Type, click Save.
- To launch a browser window and go directly to the Upload Documents screen in eDOCSignature, click Go to eDOCSignature.
- To close the eDOC-It Settings window, click Close.
Send Document for SigningSend Document for Signing
Note: These instructions assume you have already selected the Send documents for signing option on the eDOC-It Settings window.
- For the document or image you want send to eDOCSignature, in the open application or browser, click the Print button.
- From the list of available printers that appears, select eDOC-It.
- Click Print. The open document or image is sent to eDOCSignature, and an instance of eDOCSignature appears in a new window.

- In eDOCSignature, the transferred document or image is given a default document name.
To rename the document, in the Document Name box, enter a new document name. - To add the document to an existing package, click Add to Existing Package. In the window that appears, select the name of the package to which you want to add the document.
- To add the document to a new package, in the Package Name field, enter a name for the new package.
- Once the document has been named and added to a new or existing package, you can choose from the following four options: Send for Signing, Send as Reference Document, Create Template, or Send Using a Template.
Send for SigningSend for Signing
- Click Send for Signing, the Upload Documents screen appears. The transferred document appears in the Documents to Sign field.
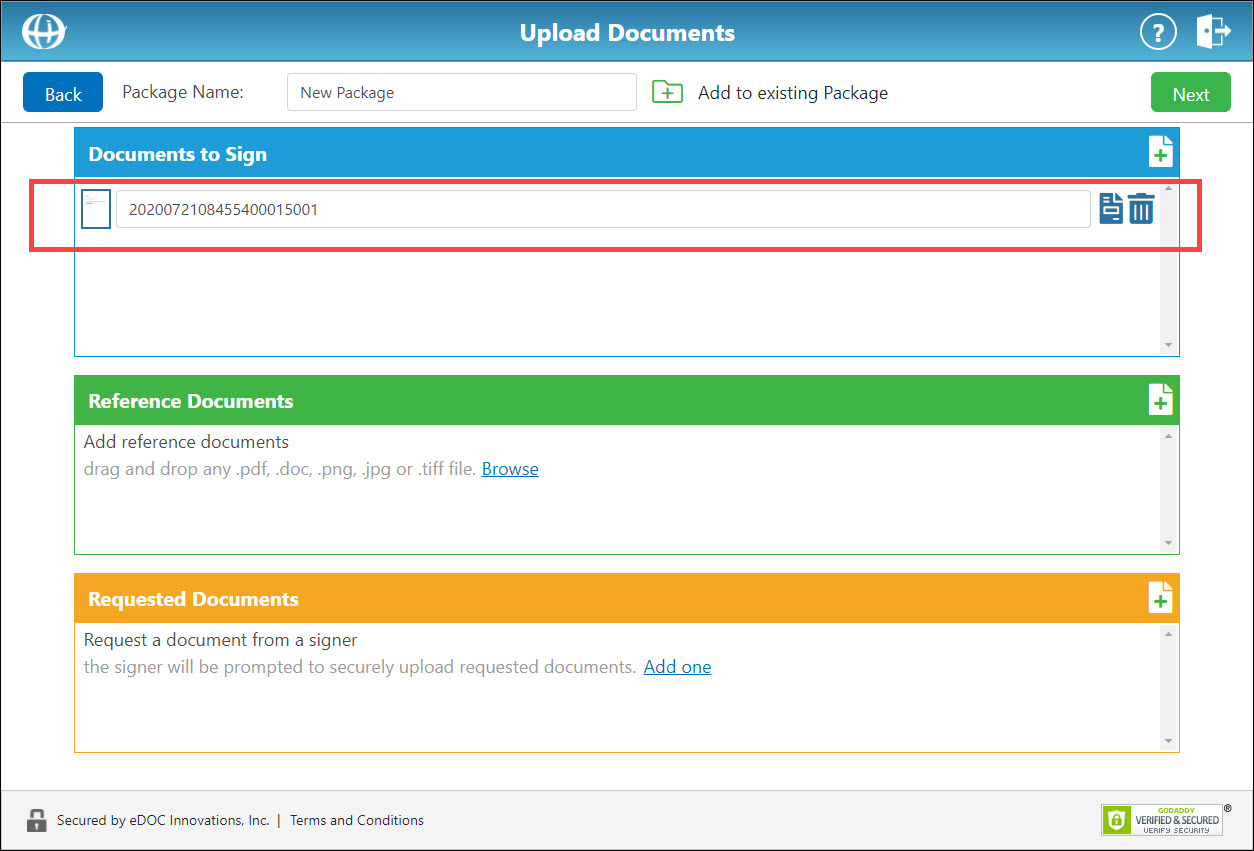
- To apply a template to the uploaded document, click the Apply Template to Document icon
 . A new window appears requesting that you select a template.
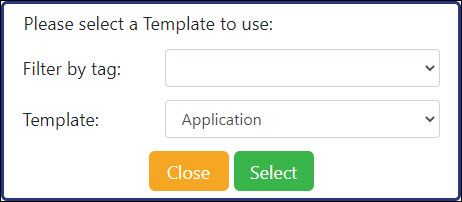
Optionally, from the filter by tag drop-down list, select a tag by which to filter your templates.
From the Template drop-down list, select the template you want to apply to a document.
Click Select. The selected template is applied to the document.
- Continue to upload additional documents to your package as needed.
-
When all desired documents have been uploaded, click Next to continue to the Select Signers screen.
Send as Reference DocumentSend as Reference Document
- Click Send as Reference Document, the Upload Documents screen appears. The transferred document appears in the Reference Documents field.
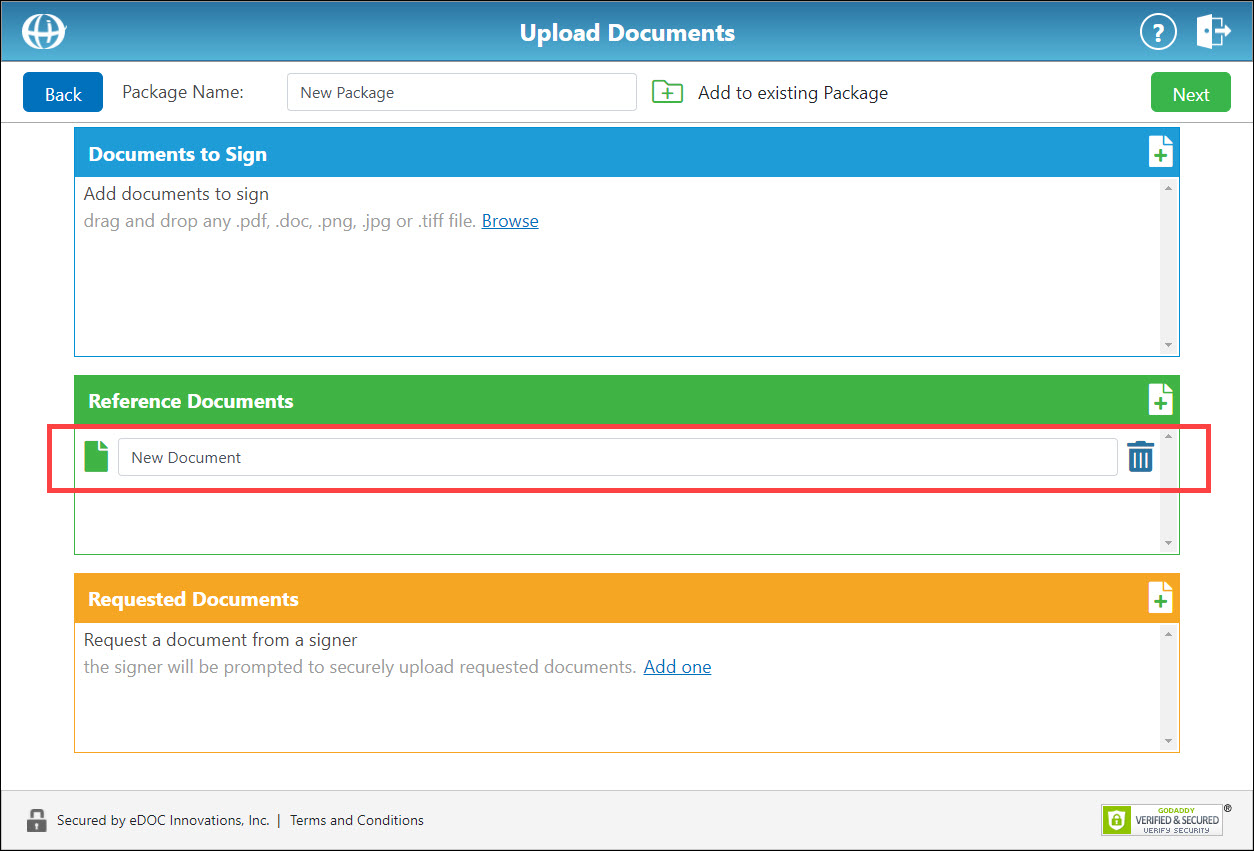
- Continue to upload additional documents to your package as needed.
-
When all desired documents have been uploaded, click Next to continue to the Select Signers screen.
Create TemplateCreate Template
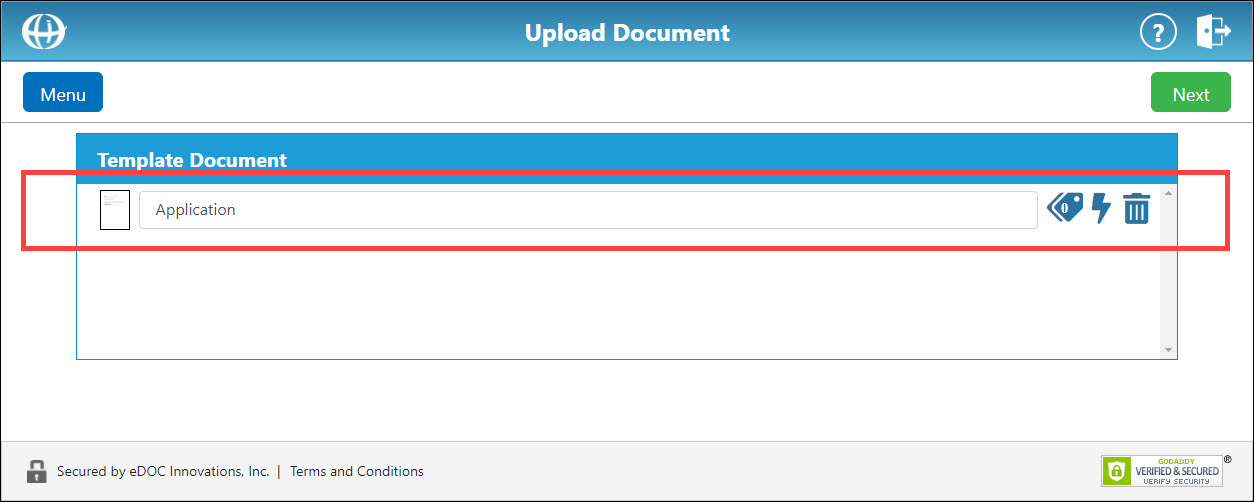
- Click Create Template, the Upload Documents screen appears. The uploaded document appears in the Template Document field.
-
The name of the signing template defaults to the name of the uploaded document. To change the signing template name, in the field beneath the "Template Document" heading, enter a new name.
-
To apply a tag or set of tags to the signing template, click the tag icon
 . In the window that appears, select the tag(s) you want to apply. When finished, click Close.
To remove the selected document and upload a new document, click the trash can icon .
.
When the desired signing template has been uploaded, click Next to continue to the Select Signer Roles screen.
Send Using a TemplateSend Using a Template
- Click Send Using a Template, the Please select a Template to use window appears. From the Template drop-down list, select an existing template.
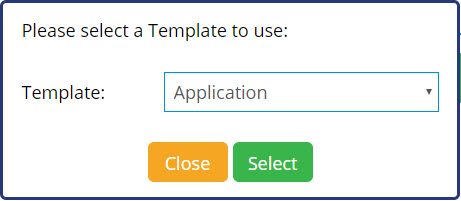
- Click Select. The Assign Signers to Roles screen appears. The default role(s), name(s), and email address(es) for the selected template are listed.

- To change the default name and email address of a signer for a role, in the corresponding Default Name and Default Email fields, enter a new name and/or email address.
- To change the message notification type for a signer role, from the corresponding Notification Type drop-down list, select a new notification type.
View Message Notification Type DescriptionsView Message Notification Type Descriptions
When a package is sent, an email notification is sent to each signer. There are four email notification message types in eDOCSignature from which you can select when sending packages out for signing: Public, Text, Private, and No Email:
-
Email – An email notification is sent to the signer. This notification typically includes a hyperlink that brings the signer to the eDOCSignature signing pages, an authentication code needed to initiate the signing process, and/or status updates about the signing process.
-
Text – A text message notification is sent to the signer. The text message includes a hyperlink that brings the signer to the eDOCSignature signing pages. This feature must be enabled by eDOC Client Development before it can be selected.
-
Home Banking – An email notification is sent to the signer informing them to log into their home banking site. Once logged in, the signer can view an additional message containing more information that has been transmitted to the home banking site via the message submission API. This additional message contains the hyperlink that brings the signer to eDOCSignature's signing pages.
-
No Email – No email notification is sent to the signer. This option is mostly used for in-person (i.e. in-branch) signing.
- To require an authentication code for a role, in the Auth Code box, enter an authentication code.
View Authentication Code DescriptionView Authentication Code Description
An authentication code is a security tool that can be used to help verify the identity of a signer. When an authorization code is entered for a signer, an email is sent to that signer containing the authorization code. During the document signing process, the signer is prompted for this code and must enter it before proceeding any further. Authentication codes can be a combination of up to six letter and numbers.
- To change the grouping order of signers, from the Group drop-down list for each signer role, select a group number.
View Grouping Order DescriptionView Grouping Order Description
Grouping order refers to the order in which signers receive a document for signing. For example, if two signers are set to be included in "Group 1" and one signer is set to be included in "Group 2," the signer in "Group 2" will not receive the document for signing until both signers in "Group 1" have completed the signing process.
- To make an ID Check required for a role, check the corresponding ID Check box.
View ID Check DescriptionView ID Check Description
ID Check allows you to verify a signer's identity before the document signing process occurs using one of the methods described below. Access to each ID Check method is subscription-based and must be enabled by a member of the eDOC Client Development team.
IDology is an out-of-wallet service that screens signers using their personal information and a series of personalized questions. The service scours billions of public data records to intelligently derive tactful, non-invasive quesitons to authenticate an identity.
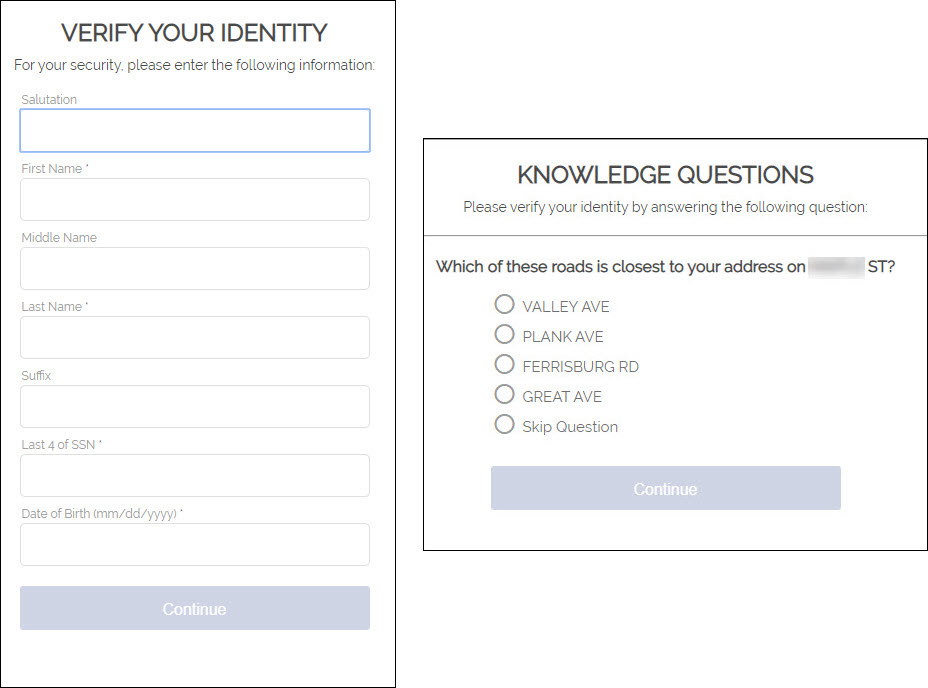
For each question, the signer has the option to choose "None of the Above" or "Skip the Question." Based on the number of questions answered correctly, your business can approve or deny the transaction. Once IDology confirms the signer's identity, they proceed to complete the signing process.
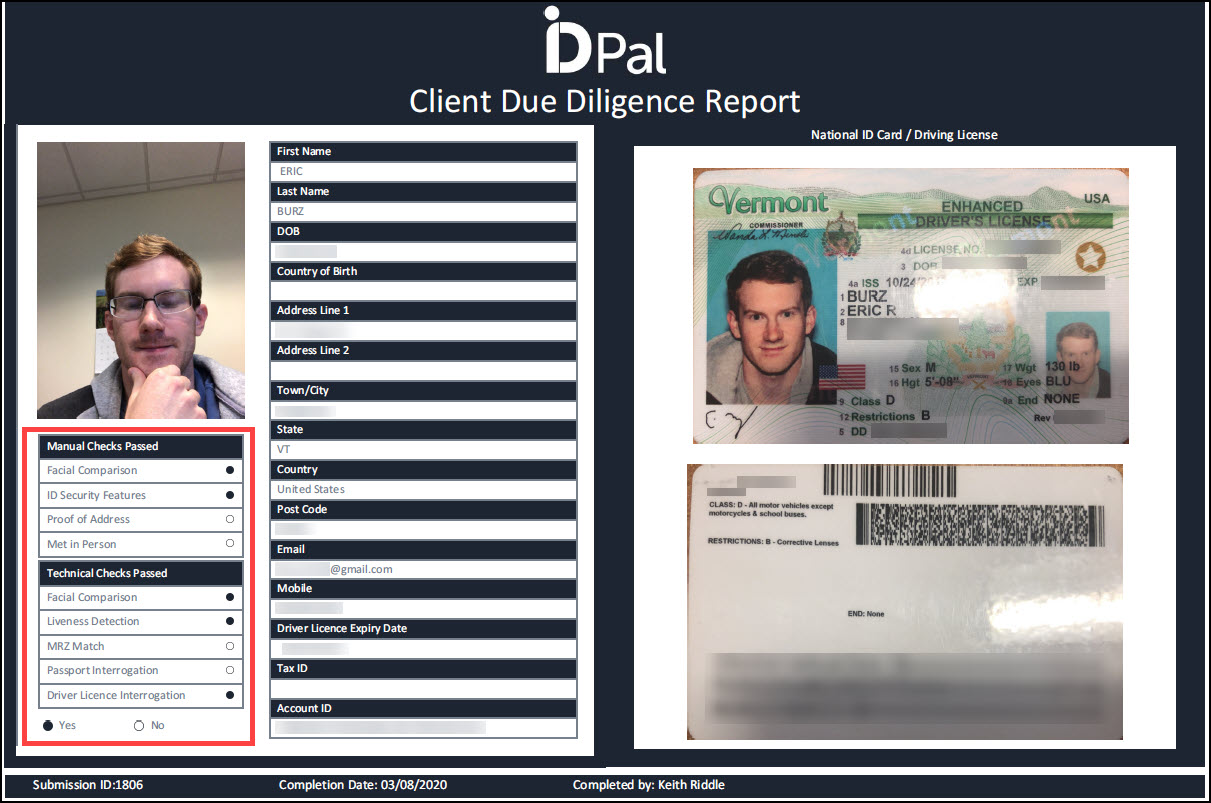
IDPal verifies a signer's identity by matching the information on their passport or driver's license with public data records. It also performs a "likeness test" using the signer's passport or driver's license photo and a current photo. Signers are sent a link to download the ID-Pal application on their mobile device. Once downloaded, signers use the application to upload a copy of their passport or driver's license as well as a current photo.
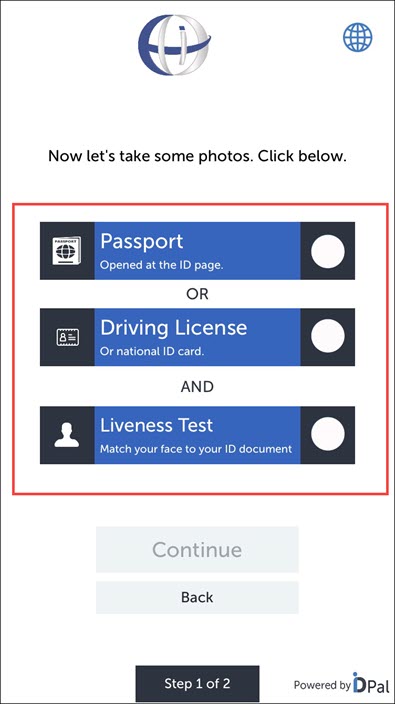
When IDPal confirms the signer's identity using the personal information and photos, they proceed to complete the signing process. A copy of the signer's Client Due Diligence Report is included with the completed package.
- When all signer and signer role information has been entered, to immediately send out the document for signing, click Send Now.
Otherwise, click Next to continue to the Index Data screen.
Send Document to Pending Docs TabSend Document to Pending Docs Tab
Note: These instructions assume you have already selected the Send documents to pending option on the eDOC-It Settings window.
- For the document or image you want to send to eDOCSignature, in the open application or browser, click the Print button.
- From the list of available printers that appears, select eDOC-It.
- Click Print. The open document or image is automatically sent to your Pending Docs tab in eDOCSignature, and a new window appears stating the document is sent to the Pending Docs tab.

Upload Documents via Drag-and-DropUpload Documents via Drag-and-Drop
Notes:
– The eDOC-It Virtual Printer system tray icon will only appear in your system tray after a document has been sent to eDOCSignature using the Virtual Printer. If you do not see the system tray icon, send a document to the eDOCSignature using the Virtual Printer.
– Unlike using the Print function, the drag-and-drop method of uploading files to eDOCSignature allows you to preserve the original name of your document or image.
- On the system tray in the bottom right-hand corner of your desktop, double-click the eDOC-It Virtual Printer system tray icon
 . The eDOC-It Settings menu appears.

- Find the document you want to upload to eDOCSignature on your desktop or in a system folder. Drag and drop the document on to the open eDOC-It Settings menu.
- Depending on your currently configured Virtual Printer settings and the file type you selected, one of the following actions occurs:
- If you selected a PDF or Microsoft Word file, the file is automatically uploaded. Depending on your Virtual Printer settings, the file is sent for singing, sent to the Pending Docs tab, or you are prompted to select one of these options.
- If you selected an image file, the Print Pictures window appears. In the Printer drop-down list, the eDOC-It printer is automatically selected. Click Print. Depending on your Virtual Printer settings, the file is sent for signing, sent to the Pending Docs tab, or you are prompted to select one of these options.